
Sadly, I did not record any notes during or after painting this squad of Reivers, so this will be a fairly short diary.
The starter set of paints I had provided everything needed for Death Guard and Ultramarine colour schemes. Unfortunately I’ve never been terribly interested in the Ultramarines; they’re too danged codex compliant, rule-abiding and blue.
Fortunately the paint set did include Mephiston Red, which turns out to be a good base colour for Blood Angels. I find the lore around the Bloody Angles suitably interesting and tragic, and my girlfriend’s favourite colour is red, which boded well for persuading her to play the game with me… so Blood Angels it was.
I ended up buying extra pots of Chaos Black and Mephiston Red to ensure I had enough, plus a pot of Troll Slayer Orange which I’d read would be good for edge highlights over Mephiston Red. I also bought a spray primer of Chaos Black to save myself some effort with an undercoat over the Ultramarine-friendly blue plastic of the miniatures.
You’ve probably noticed already but Citadel paints have fun names that suggest little to nothing about what a colour will look like. Who the fuck is Mephiston? What is “chaotic” about this black paint?
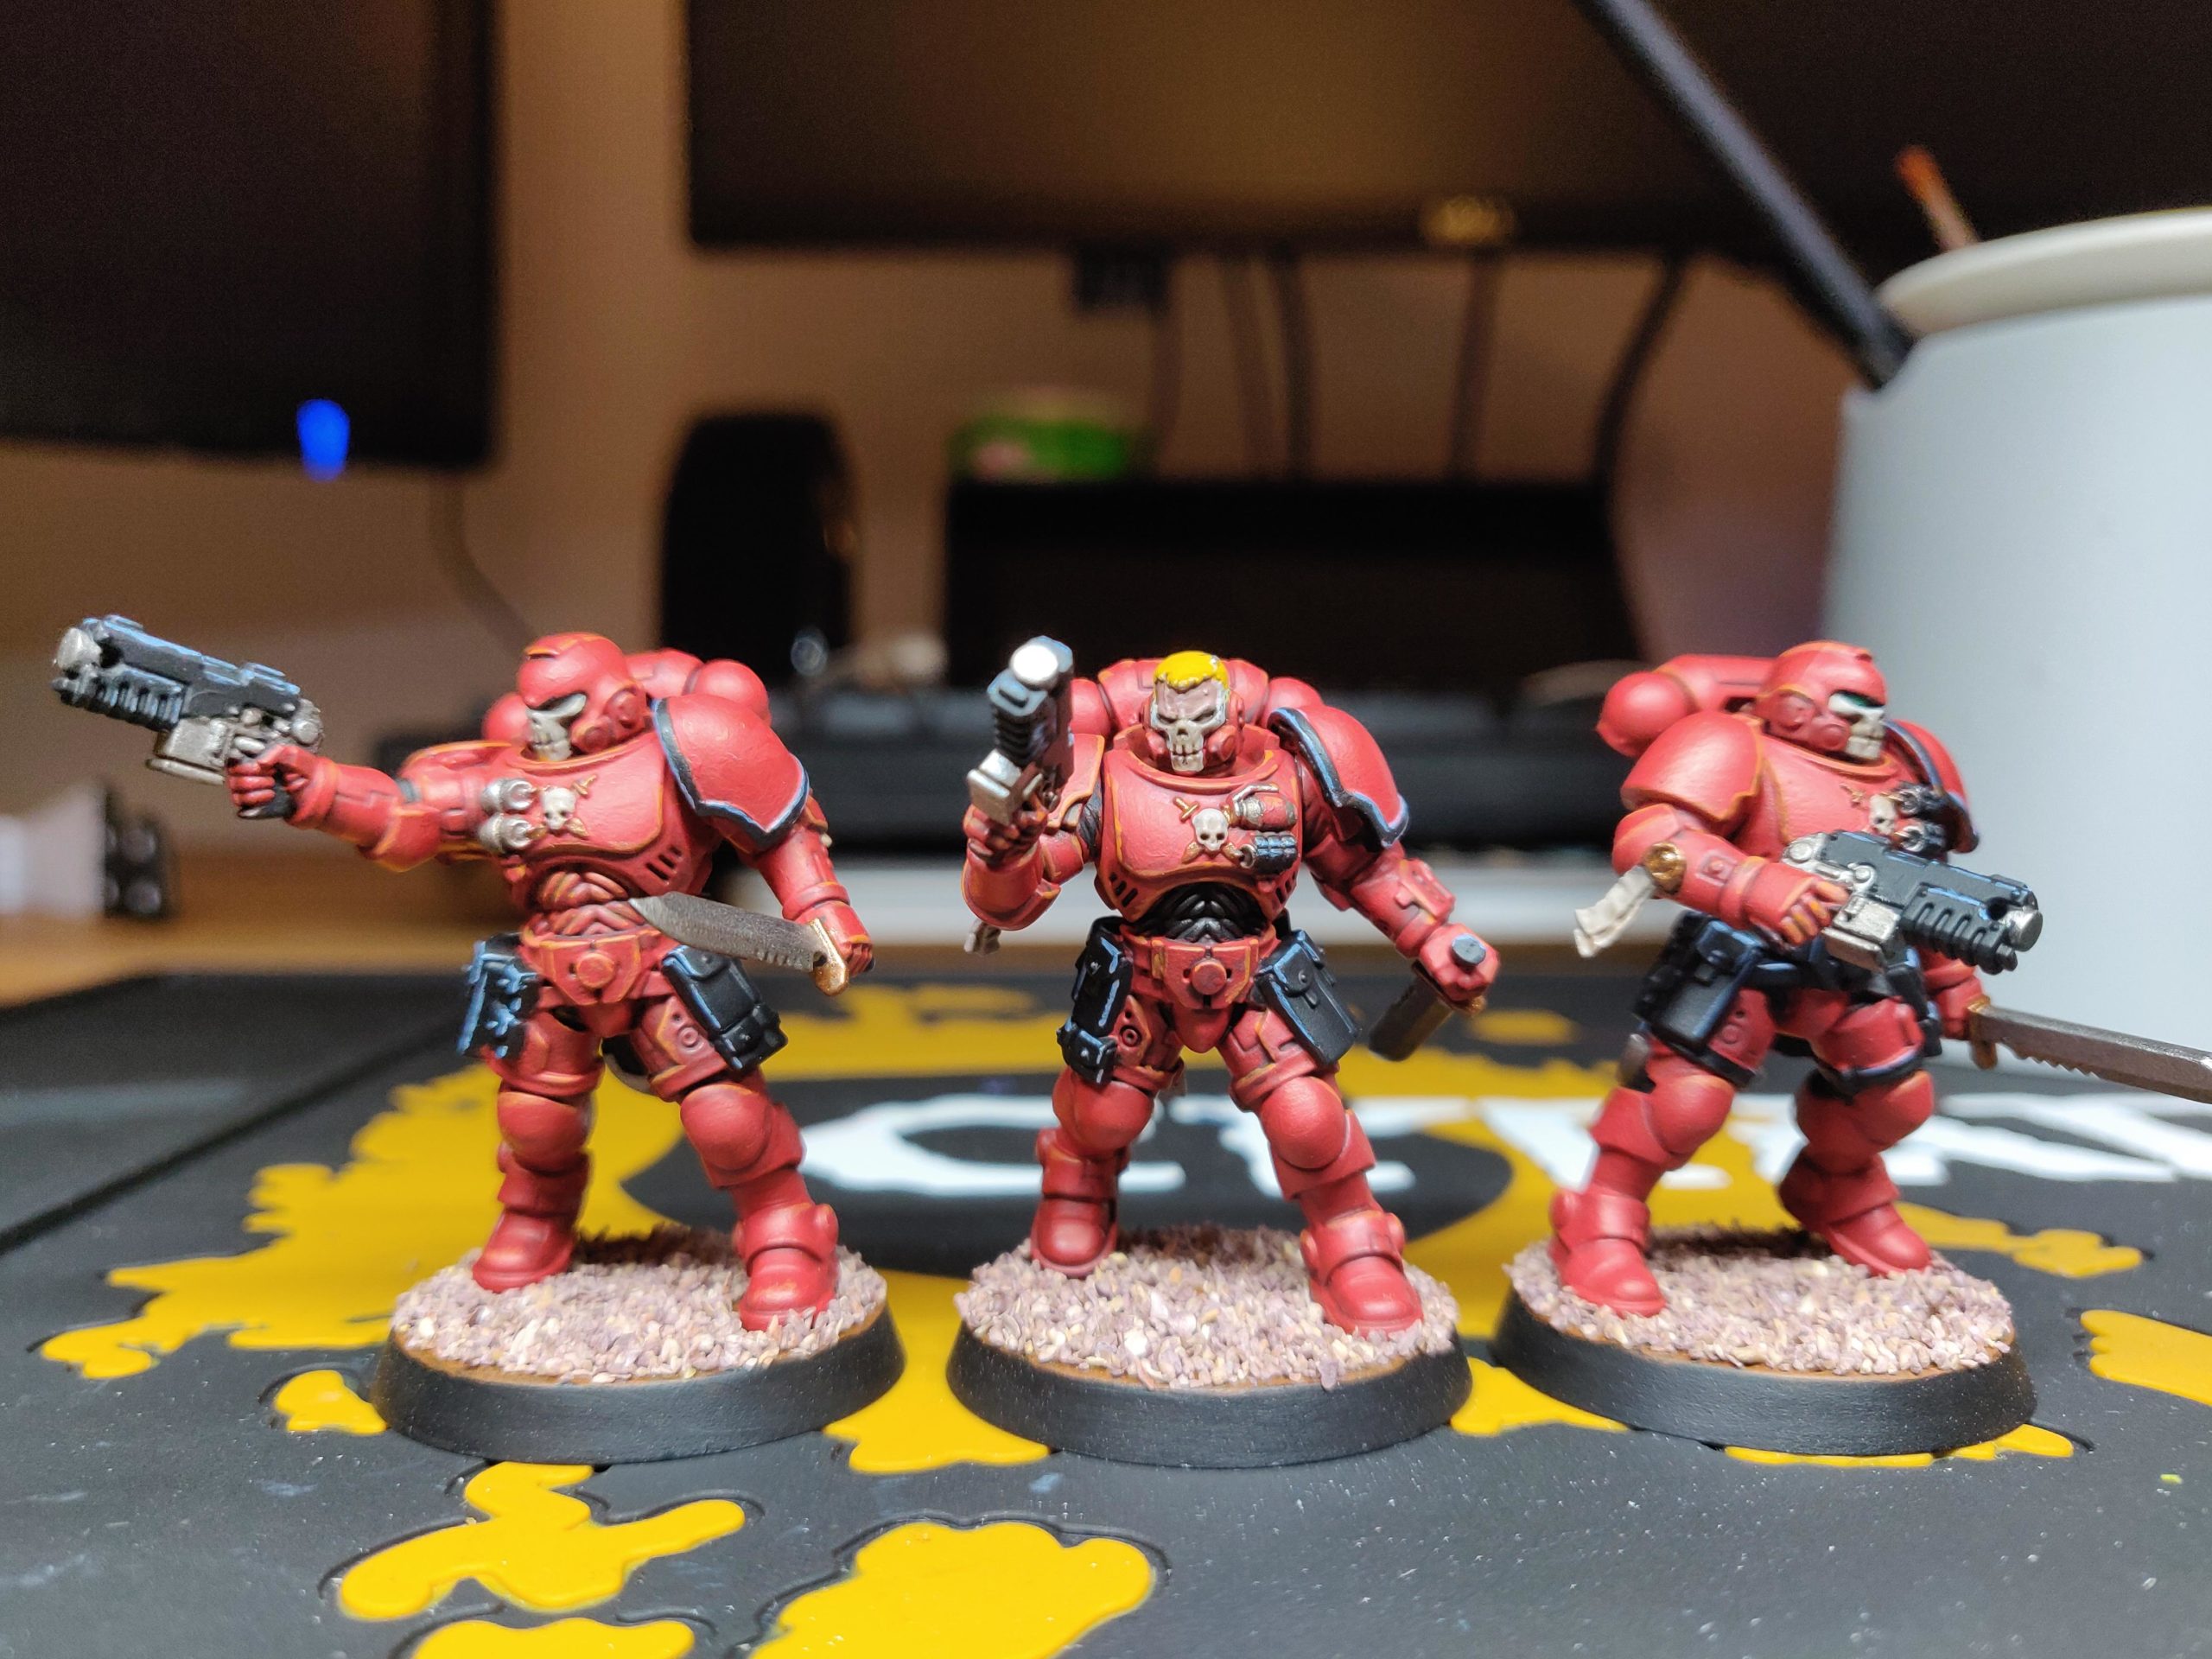
The full squad!


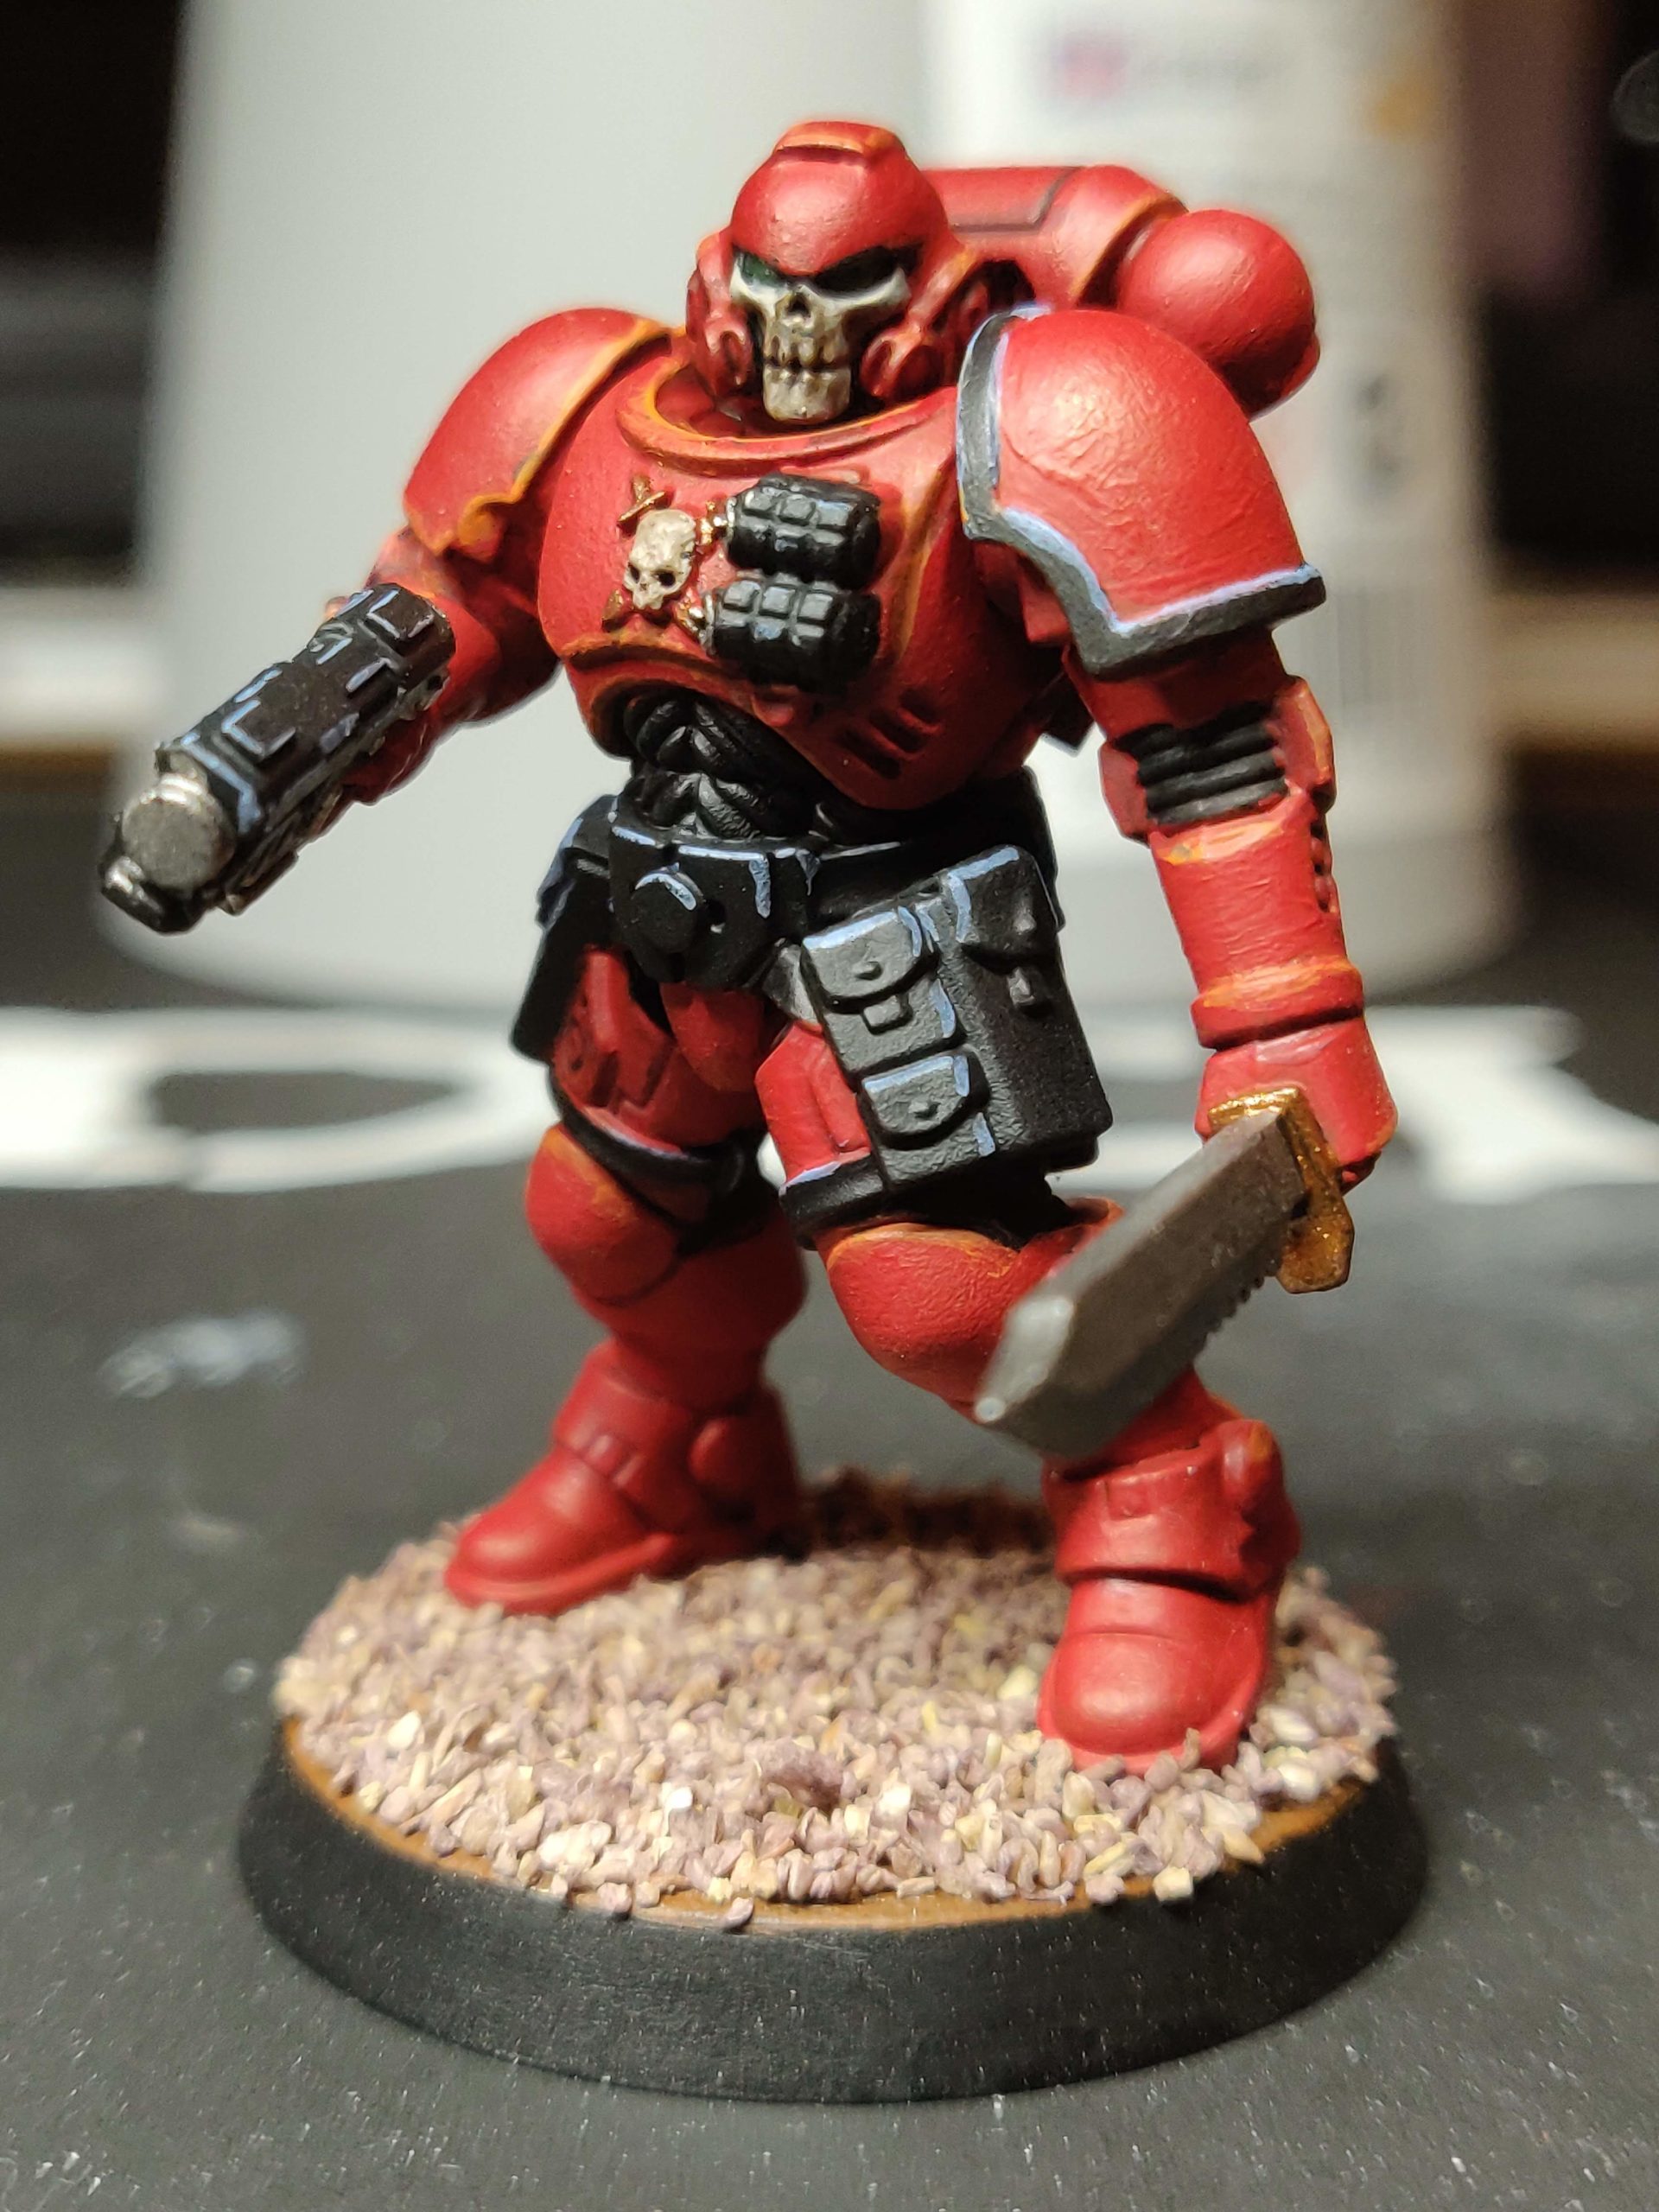
Close ups of the two Reiver troopers and their Sergeant
What am I pleased with?
I like how delicately the washes were applied in some areas, particularly the faces with the skull faceplates. Conversely I think the wash was too delicate for most areas. Those big red areas of armour are so monotone!
I like how clean my painting is for the most part. Whilst these miniatures don’t look amazing by any stretch of the imagination, I was pleased with the general precision of my work in the basecoating steps, and how rich the red colour is.
I had not attempted proper edge highlighting before painting these Reivers (correction: looking at some of the ‘best’ of my teenage efforts, there’s evidence I was attempting edge highlighting back then and was not good at it). Hopefully it makes sense to say I was proud of what I knew to be poor work! I liked the orange a lot more than the grey, although it should be said that the orange is so subtle it’s hard to spot at a distance even when you know it’s there, whereas the grey stands out more from a distance but I think it looks awful up close.
I prefer Army Painter’s “battlefield flock” to the texture paint I used with my Death Guard. It’s significantly simpler to apply and looks better than the Armageddon Dust I used with them.
What have I learned?
This experiment in highlighting was informative.
I think the main areas where I went wrong were poor colour choice, some clumsy lines where highlighting wasn’t suitable, and being too sparing about where I applied the edge highlights. Therefore next time I ought to think more carefully about the paints I use for highlights, possibly mixing white into colours rather than using whole other paints, to apply highlights in far more locations to increase the overall contribution to contrast, and to only use edge highlights on sharp edges.
I also think the attempts at grey edge highlights on the ‘light-facing’ edges of the pauldron border were ill-advised. They’re the worst looking things on the miniatures that I can see.
I also felt the bases, although better, were still very plain. I feel a little like these three guys are wandering about an Essex garden centre.
What will I try in future?
More edge highlighting, and better judged highlights generally!
Greater application of wash/shade, but keeping the precision of application!
After finishing these Reivers I bought some little Army Painter shrubs to spruce up my bases a bit more. And because the black spray primer worked out so well, I thought about applying my Mephiston Red base coat using another aerosol primer to save more time, and bought a can of that too.
Finally, I bought myself a proper wet palette, which gave me a lot more area to work with. I hoped this would be beneficial for mixing paints compared to the very small working area in my DIY margarine tub…