My final squad of miniatures from the First Strike starter set did not begin well. I had spray-primed them black alongside my Reivers, but after base coating those by hand in red I wanted to try a second layer of spray paint for the Intercessors. Unfortunately, my can of Mephiston Red was inadequately shaken on a hot, sunny dry and held too far away… with the result that the miniatures ended up with a horrible, grainy texture which would come away at the gentlest touch. They were ruined!
Well, not quite. I knew how to remove paint from old-school metal miniatures, and that it was possible to do the same on plastic – just not with acetone.
The most time consuming part of painting this squad was, ironically enough, figuring out how to remove that bad paint job whilst living in a country where I am wholly unable to read the small print on bottles of domestic chemicals. I bought three different products and tested them in parallel; a fine application of the scientific method except that none of them worked at all. Eventually I learned where I could buy 99.9% isopropyl alcohol, and bought a rather small and expensive bottle of a product designed for cleaning muck off vinyl records. Fortunately this stuff did the trick, and after a few soak & scrub sessions I had almost all the paint off.
My second attempt at spray priming these minis was a lot more successful. I had hoped to try a crude ‘zenithal’ undercoating technique by priming all over with black, then from a broad overhead angle with white. Unfortunately I’d forgotten that my only can of white primer was 22 years old, and after testing it was clear that even following five minutes of shaking it was too globby for use with miniatures.
Instead, I achieved something slightly like that technique when I applied the red spray primer for a second time, by applying a thin coat and allowing the areas ‘in shadow’ to get minimal coverage. My hope was that by applying watered down paint over those areas, a shadow effect would show through.
Since painting the Bone Golem I’d also discovered a second local hobby store, and this one sold Vallejo! So I picked up a number of their paints, intending to paint the Intercessors only using those. In the end I found the red I’d bought was too pink for Blood Angels so I went back to Mephiston Red, but I did make use of those Vallejo paints for the blacks, highlights and the sergeant’s helmet-less head.
Finally, for this squad I outlined a fairly detailed plan in advance. This included applying a wash first, before base coating the raised surfaces. Rather than basecoating in the order of descending total surface area, I planned to start with black, then metallics, then pale details, then red. I also planned to apply highlights for each colour before moving on to the next basecoat. I didn’t entirely stick to the plan but I felt I benefited from creating it, and then diverging when I felt it made sense to do so in the moment.
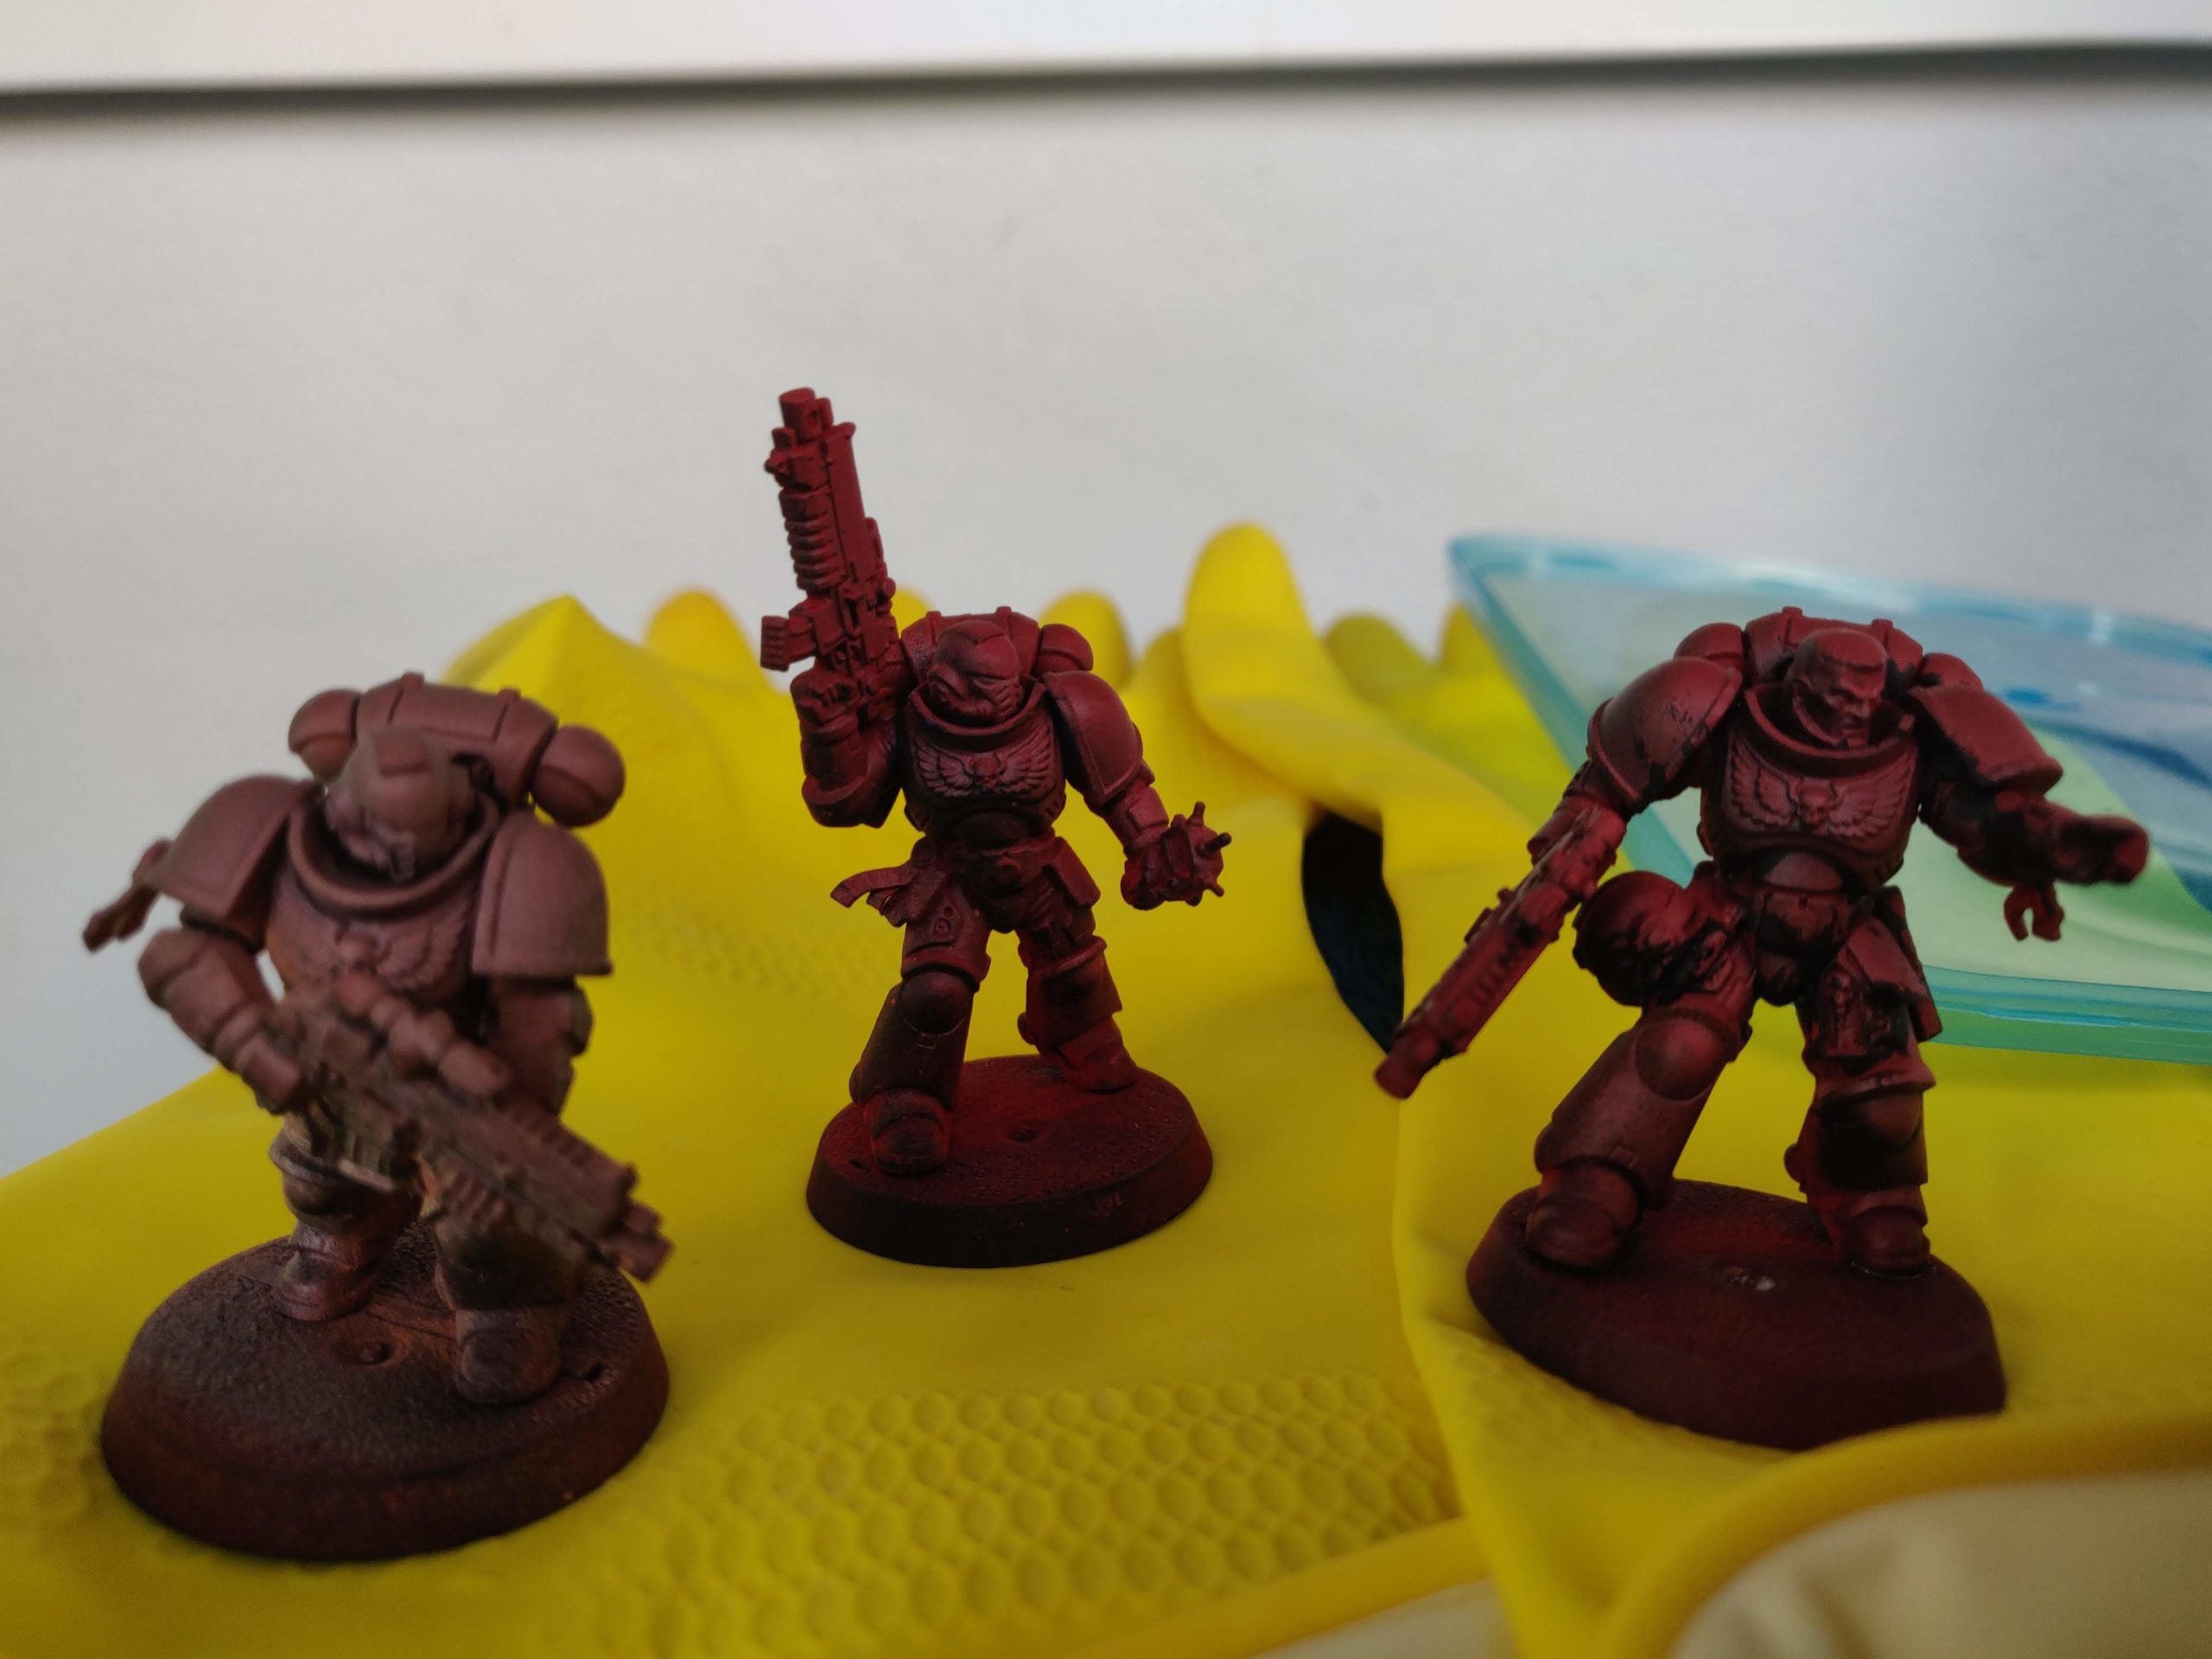
After my first attempts at stripping paint. The guy on the left spent most of a week in what I later realised was little more than bleach…

After re-priming, painting the black areas and adding some highlights

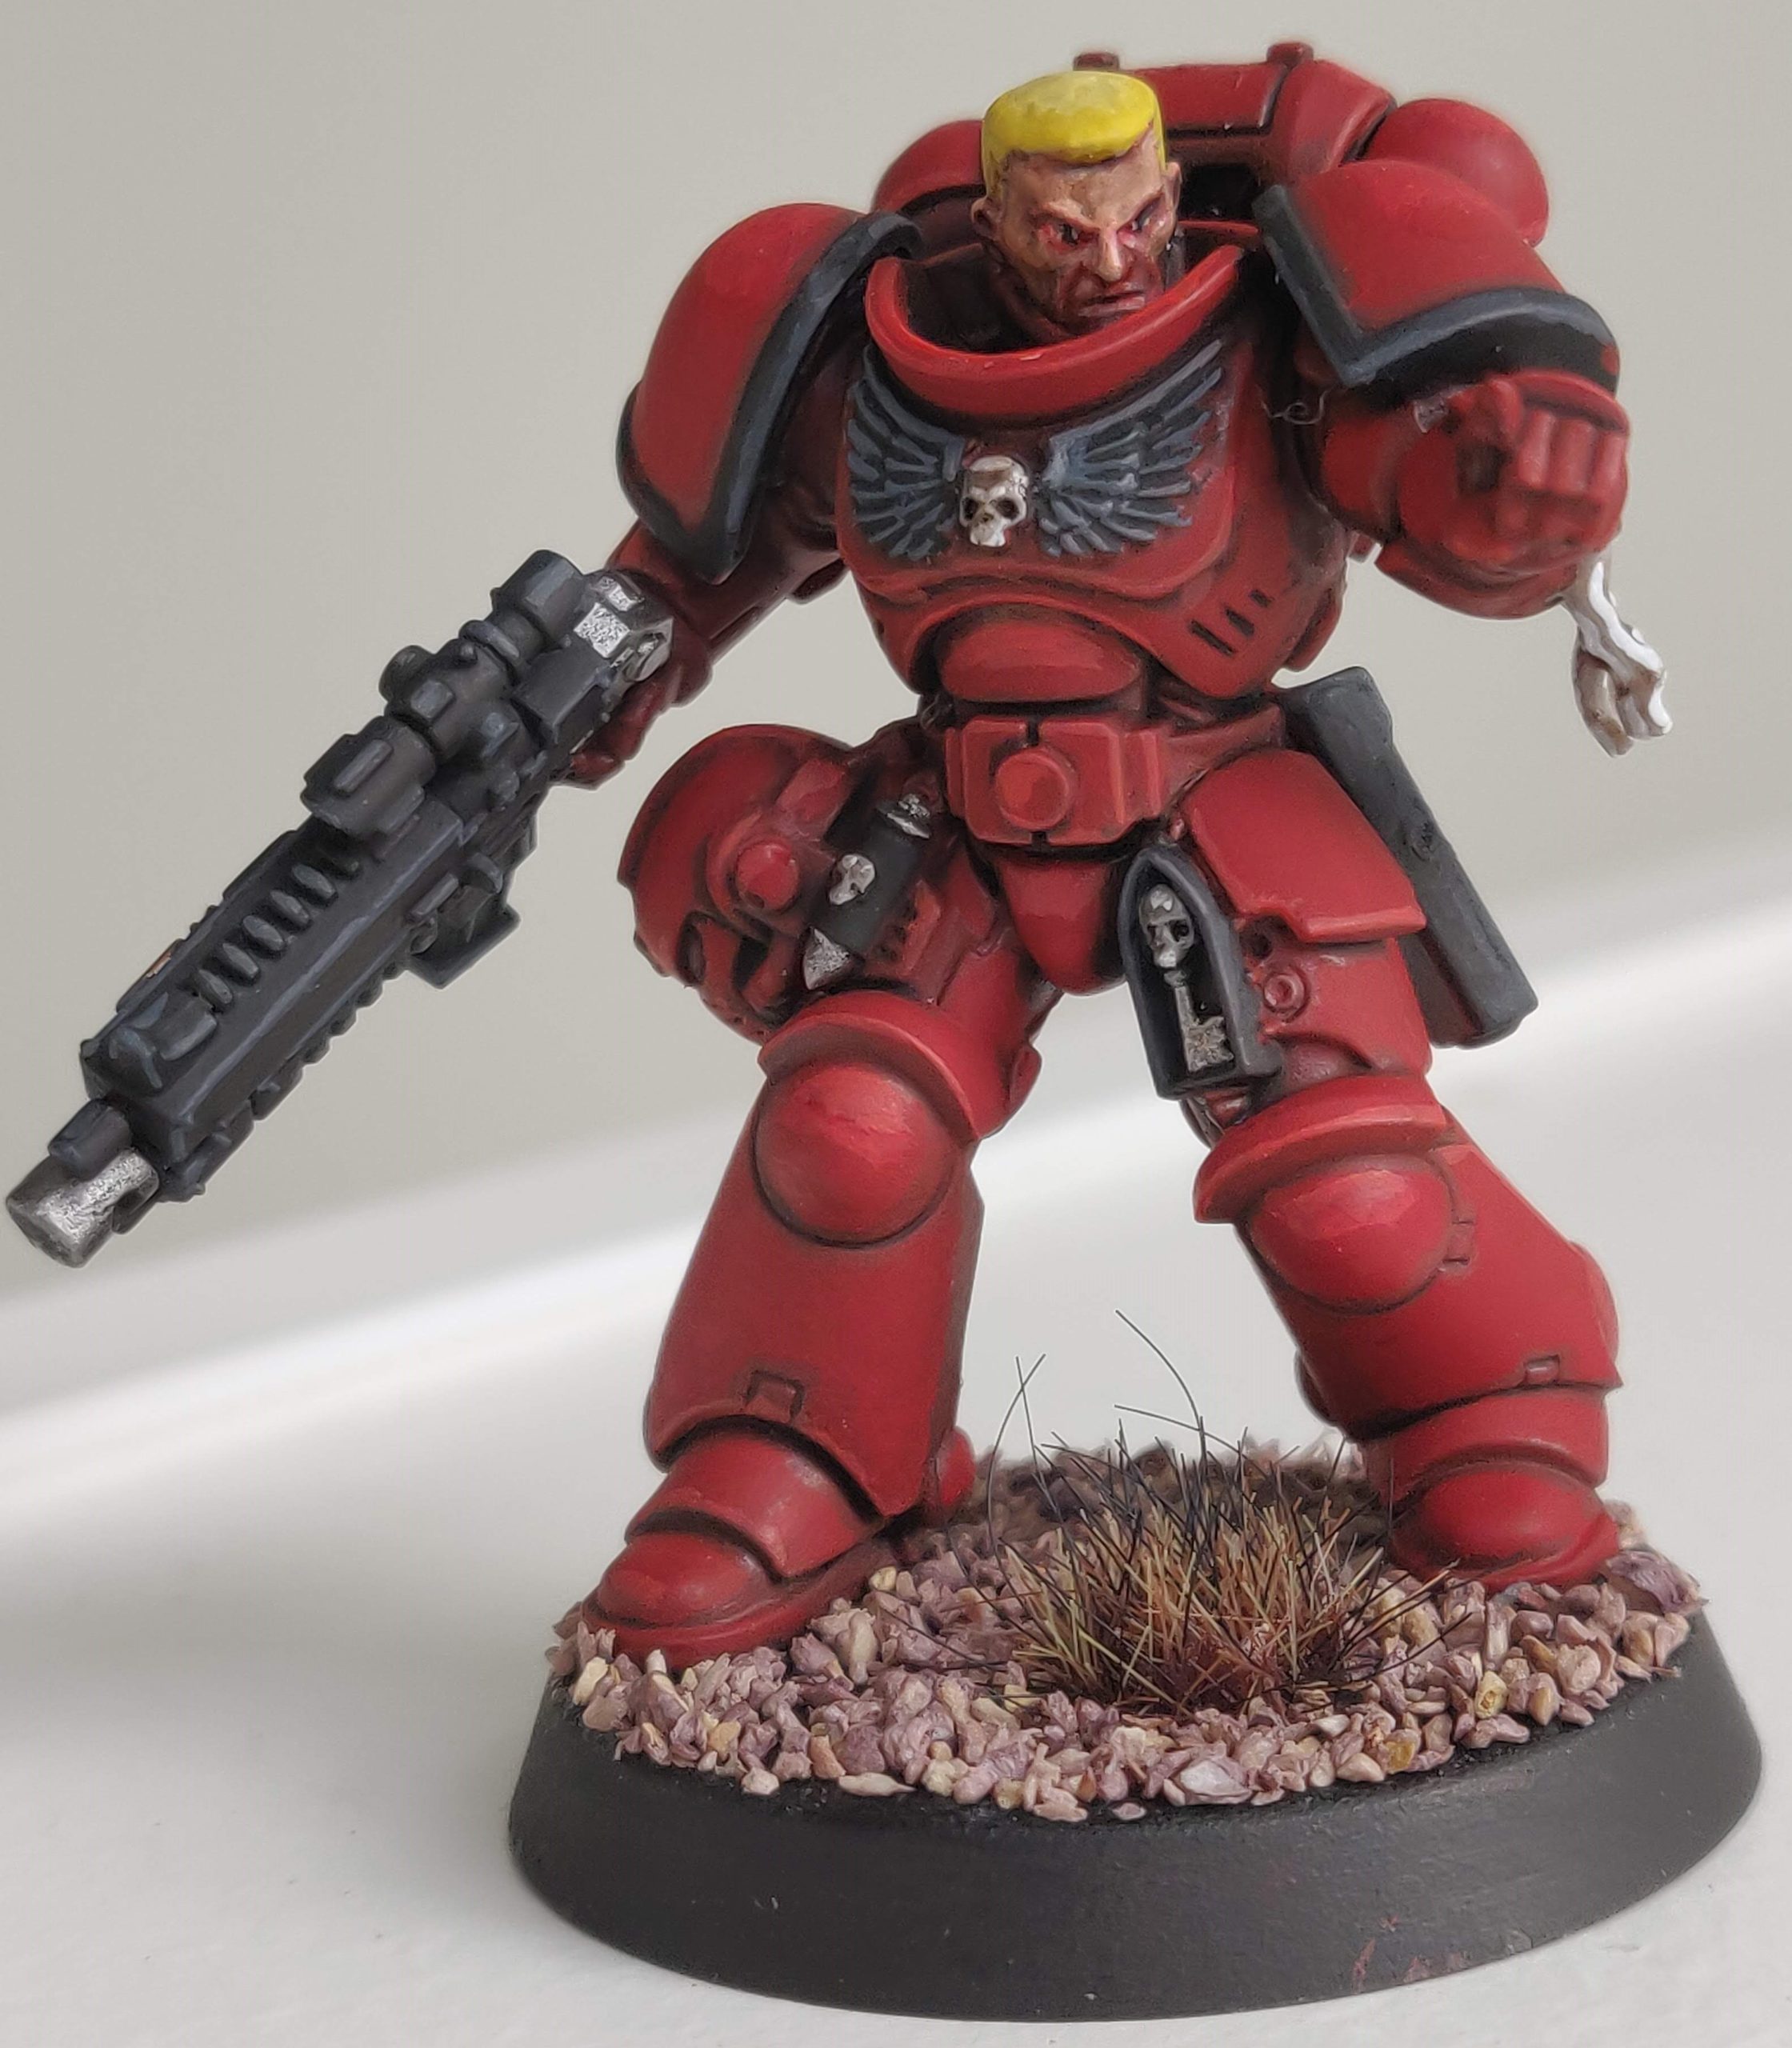
“Sergeant Fucked Face” vs. “Sergeant Fixed Face” – first shot was under my painting lamp, second shot under natural light on an overcast day (that’s why the reds look more saturated in the first photo)
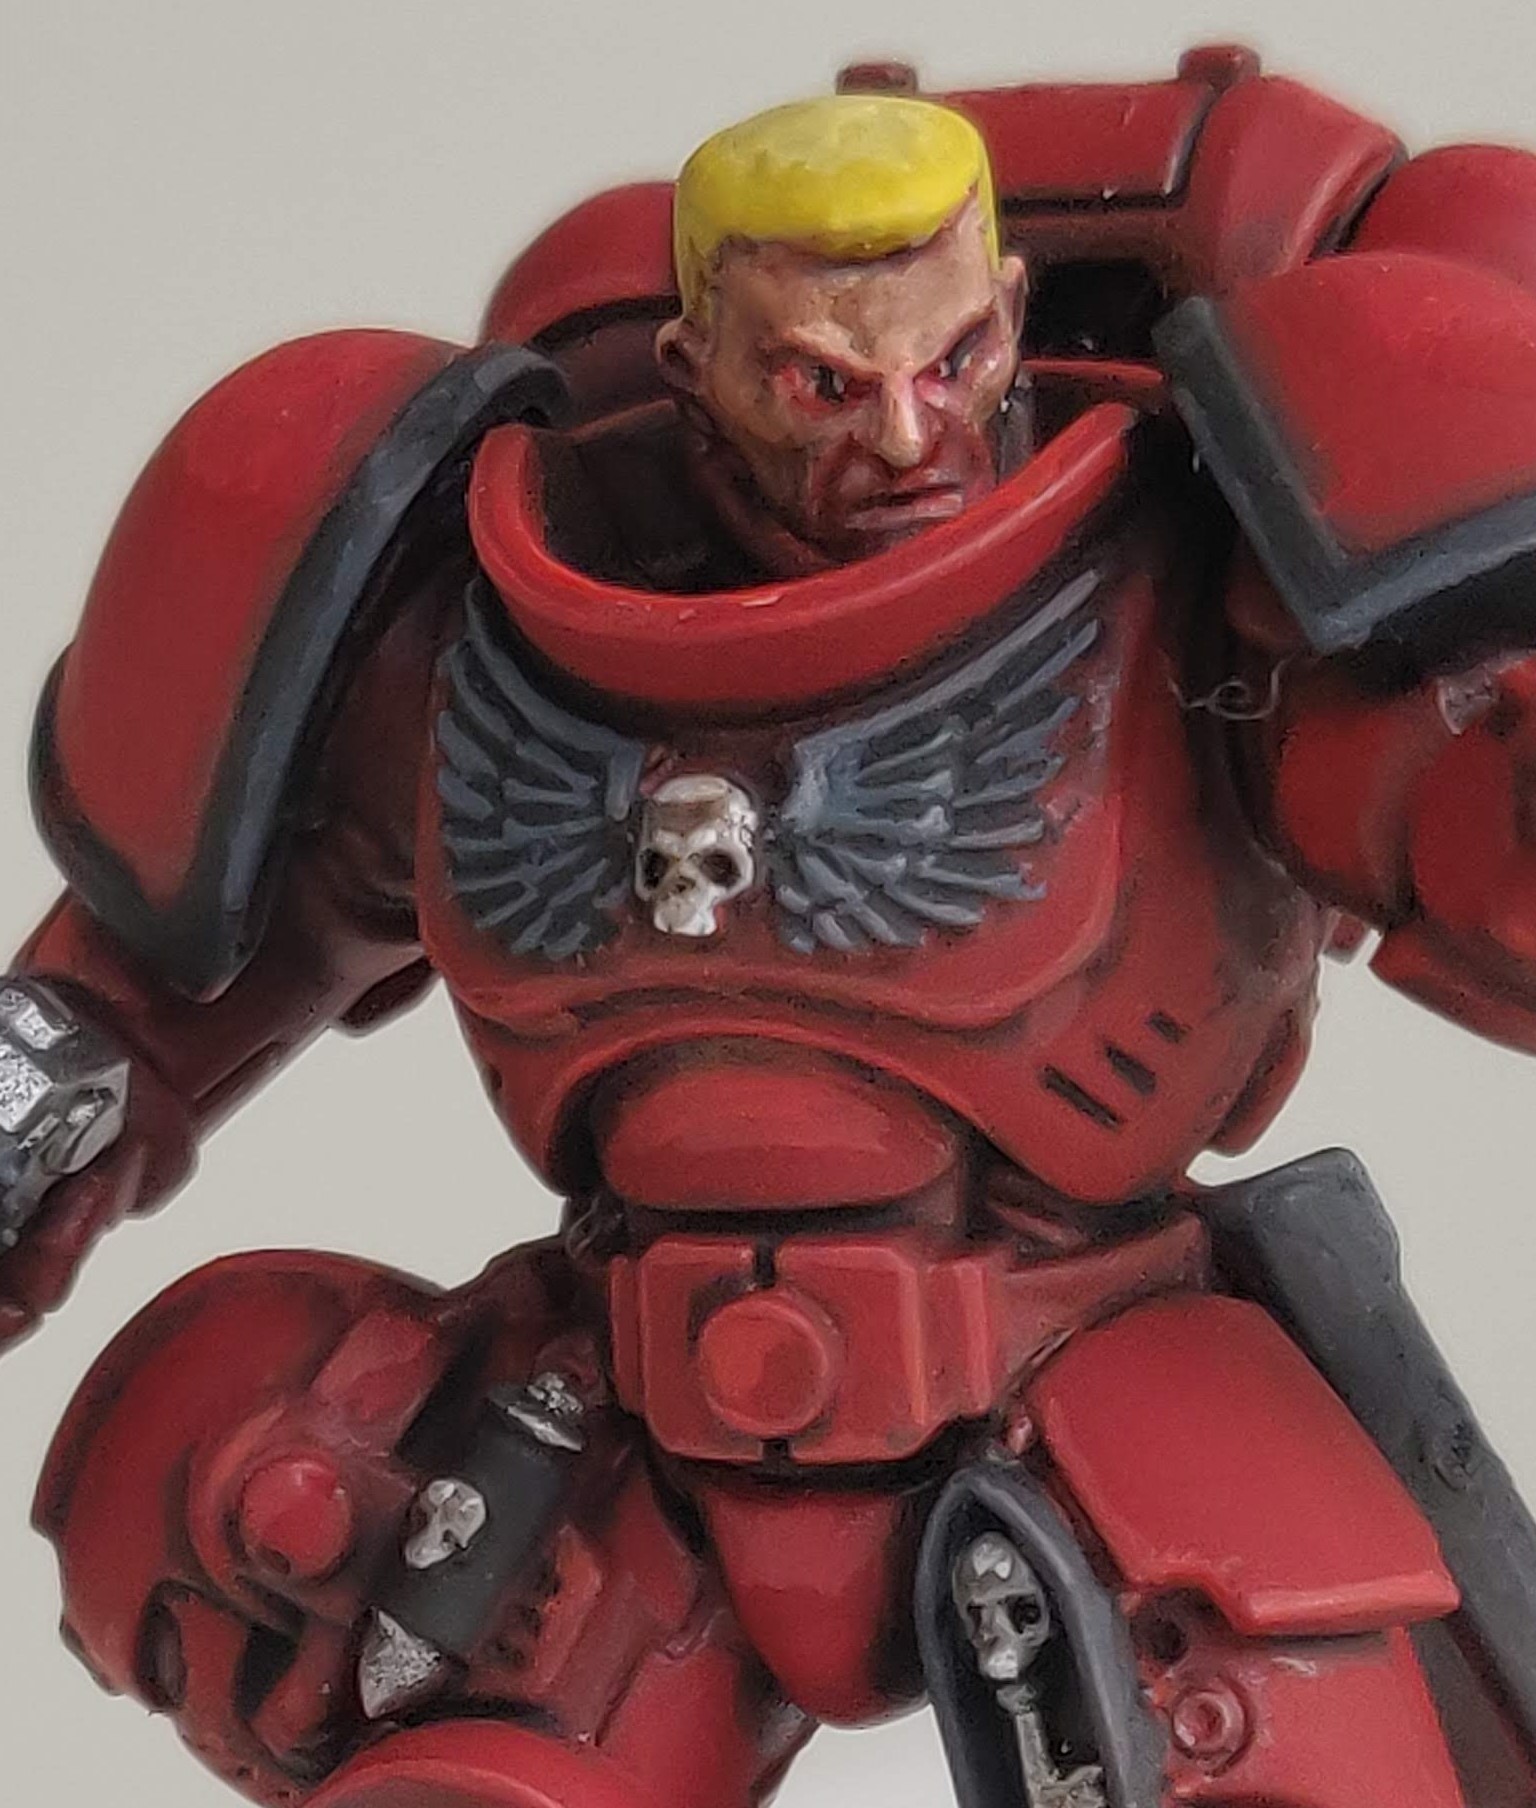
Close-up on my efforts to fix the face. The further you zoom in the worse the eyes look – but they look right from a distance!
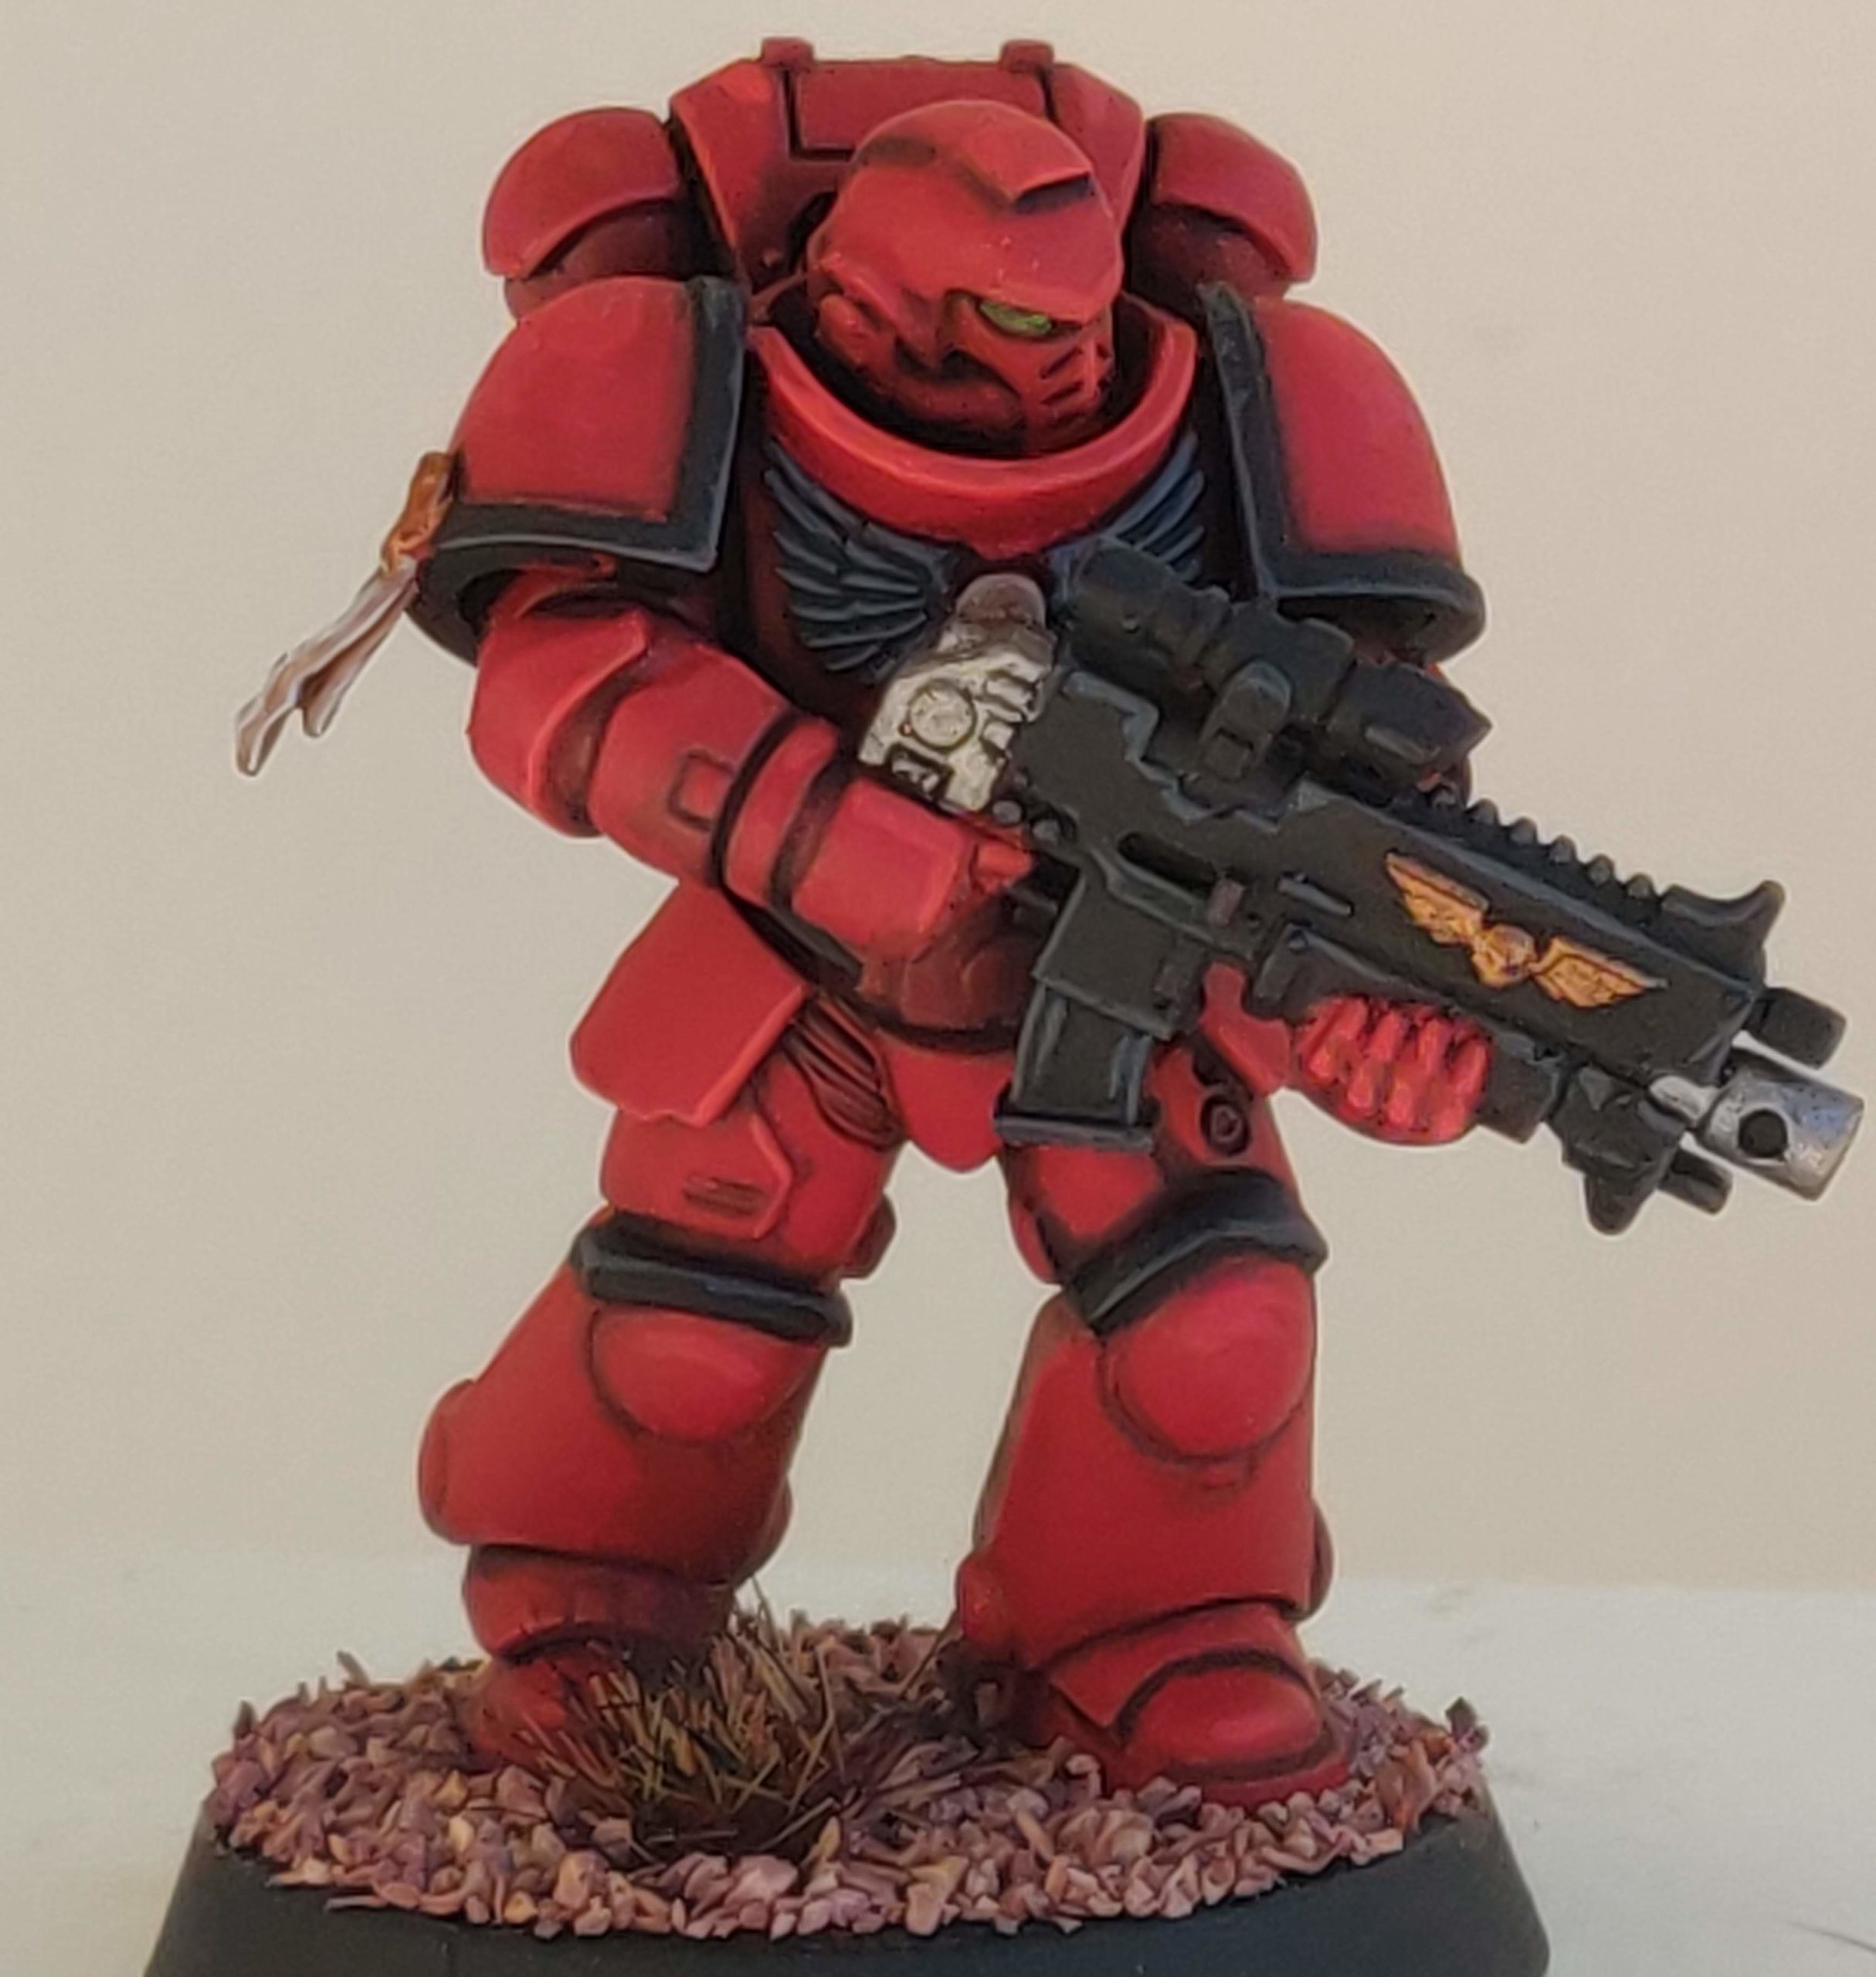

The finished versions of the two Intercessor troopers. The marine on the left is my favourite painted miniature to date.
What am I pleased with?
These are far and away the best miniatures I’ve painted, and there’s a lot I love about them.
The edge highlighting demonstrates everything I learned from painting the Reivers: chiefly more highlights and better colour choices. Although Vallejo Bloody Red turned out to be a bad base colour for Blood Angels, I think it’s a great colour for edge highlighting over Mephiston Red! On the palette it looks like a hot pink, but it seems to show more orangey tones as it dries.
The small attempts at shading on the pauldrons are not great, but it was fun to do a lot more colour mixing on the palette. Because some of these efforts at shading had transitions that were far too stark, I also tried heavily mixing Mephiston Red to produce a sort of glaze that I carefully applied over the top to smooth them. I think if anything this only slightly muted the stark transitions, but it was another first and I had fun trying it.
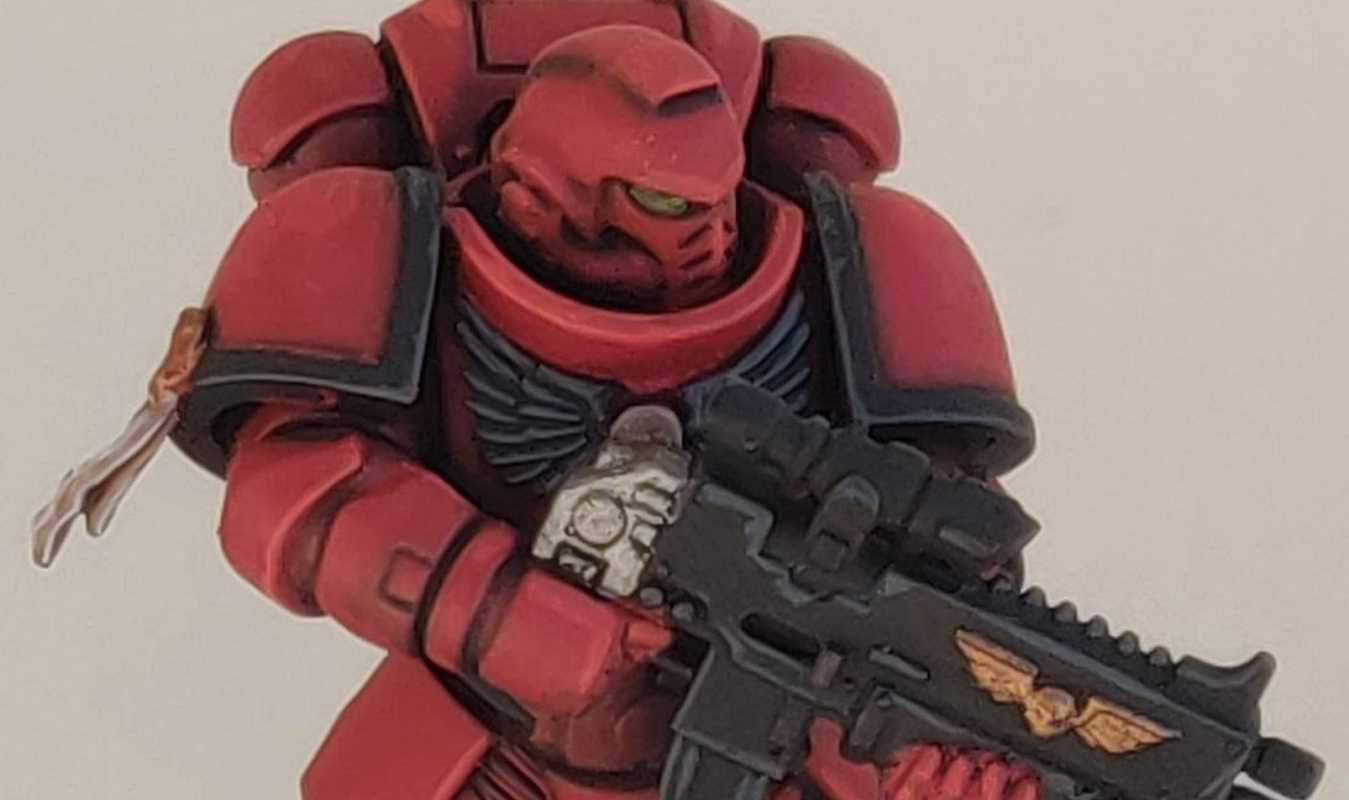
The green lenses in the helmets I’m also rather proud of. I used Vallejo Scorpion Green mixed with black for those, then used the same unmixed green to put little dots on the sides to get a simple light reflection effect. I wouldn’t go so far as to say the effect was successful, but I tried, and I didn’t mess up the lenses. That’s another win!
Although I didn’t water down my paints anywhere near enough to get the shadow effect I’d hoped for from my pseudo-zenithal spray primer approach – I mostly covered up all that – the spray primer does live on because I avoided painting the recesses of the armour. With the help of the wash prior to basecoating, I think the result is actually better than anything I’ve gotten applying a wash after all the basecoating steps, and it generally looks cleaner too! I’ll definitely try that technique again. It’s also a big time saver as I only need to basecoat the areas of armour plating by hand.
What have I learned?
Faces are hard. Oh god, the sergeant’s face! Don’t look at it! My initial efforts were a gross pink, with a glossy shine thanks to Strong Tone (which seems a lot more shiny than Agrax Earthshade). I reined this in a bit later but it still doesn’t look great. The eyes aren’t very good either, although I at least got the pupils into the right place…
These miniatures were the first ones I shared online outside a select group of friends or family, and I got some good feedback on the Squidmar discord. The model holding up its rifle is too monotone, and needs more black areas to offset the red. Also, it was suggested that I try adding the basing material earlier and painting it – a green in particular would offset the largely red scheme of these miniatures too. As well as these great suggestions I got some encouraging words as well, so I certainly learned that having the courage to share your work with people is worth doing.
I also learned that edge highlighting is very effective and really makes miniatures stand out! I look forward to further developing these skills.
Finally, I learned that thinning paints is another art that demands practice. My black layers were sometimes much too thick, and even my reds were so thick that they obscured all trace of the ‘shadows’ I’d established during priming.
What will I try in future?
I want to build on this edge highlighting foundation. I need lots of practice to improve my precision and the consistency of my brush strokes. Aside from that, I think I should apply several layers of these highlights. A very fine near-white edge highlight over wider bands of the reddish pink I used could really make these miniatures pop.
I shall plan more projects in future as well. I don’t want to go too far and feel I am constraining my creativity, but thinking in advance about which areas ought to be which colour would have helped avoid one of the Intercessors looking too damn red.
I will also be experimenting with basing earlier and painting the ground – perhaps a moss effect would work well with these Blood Angels?
Finally, I’m going to need a lot more practice painting flesh…