As I sank blissfully into my new painting hobby, I found myself regularly visiting my “Friendly Local Game Store”, the Helsinki branch of Fantasiapelit. As well as Games Workshop and Citadel products they stock Army Painter paints and peripherals, and a wide variety of miniatures including cheap blister pack minis from Reaper, the D&D brand and others (not to mention an excellent board game selection and an entire aisle of manga I studiously ignore).
One of the coolest miniature designs among these cheaper brands was a ‘Bone Golem’ from Wizkids, which was under five euros and looked fun to paint.
I also wanted to try some paints that weren’t from Citadel. I’d heard great things about Vallejo but, after speaking to one of Fantasiapelit’s employees, it was clear they were only stocking Citadel and Army Painter. So, Army Painter it was! I bought a starter set of 10 paints (8 regular, 1 metallic, 1 wash) including a brush and decided to use only these for the Bone Golem.
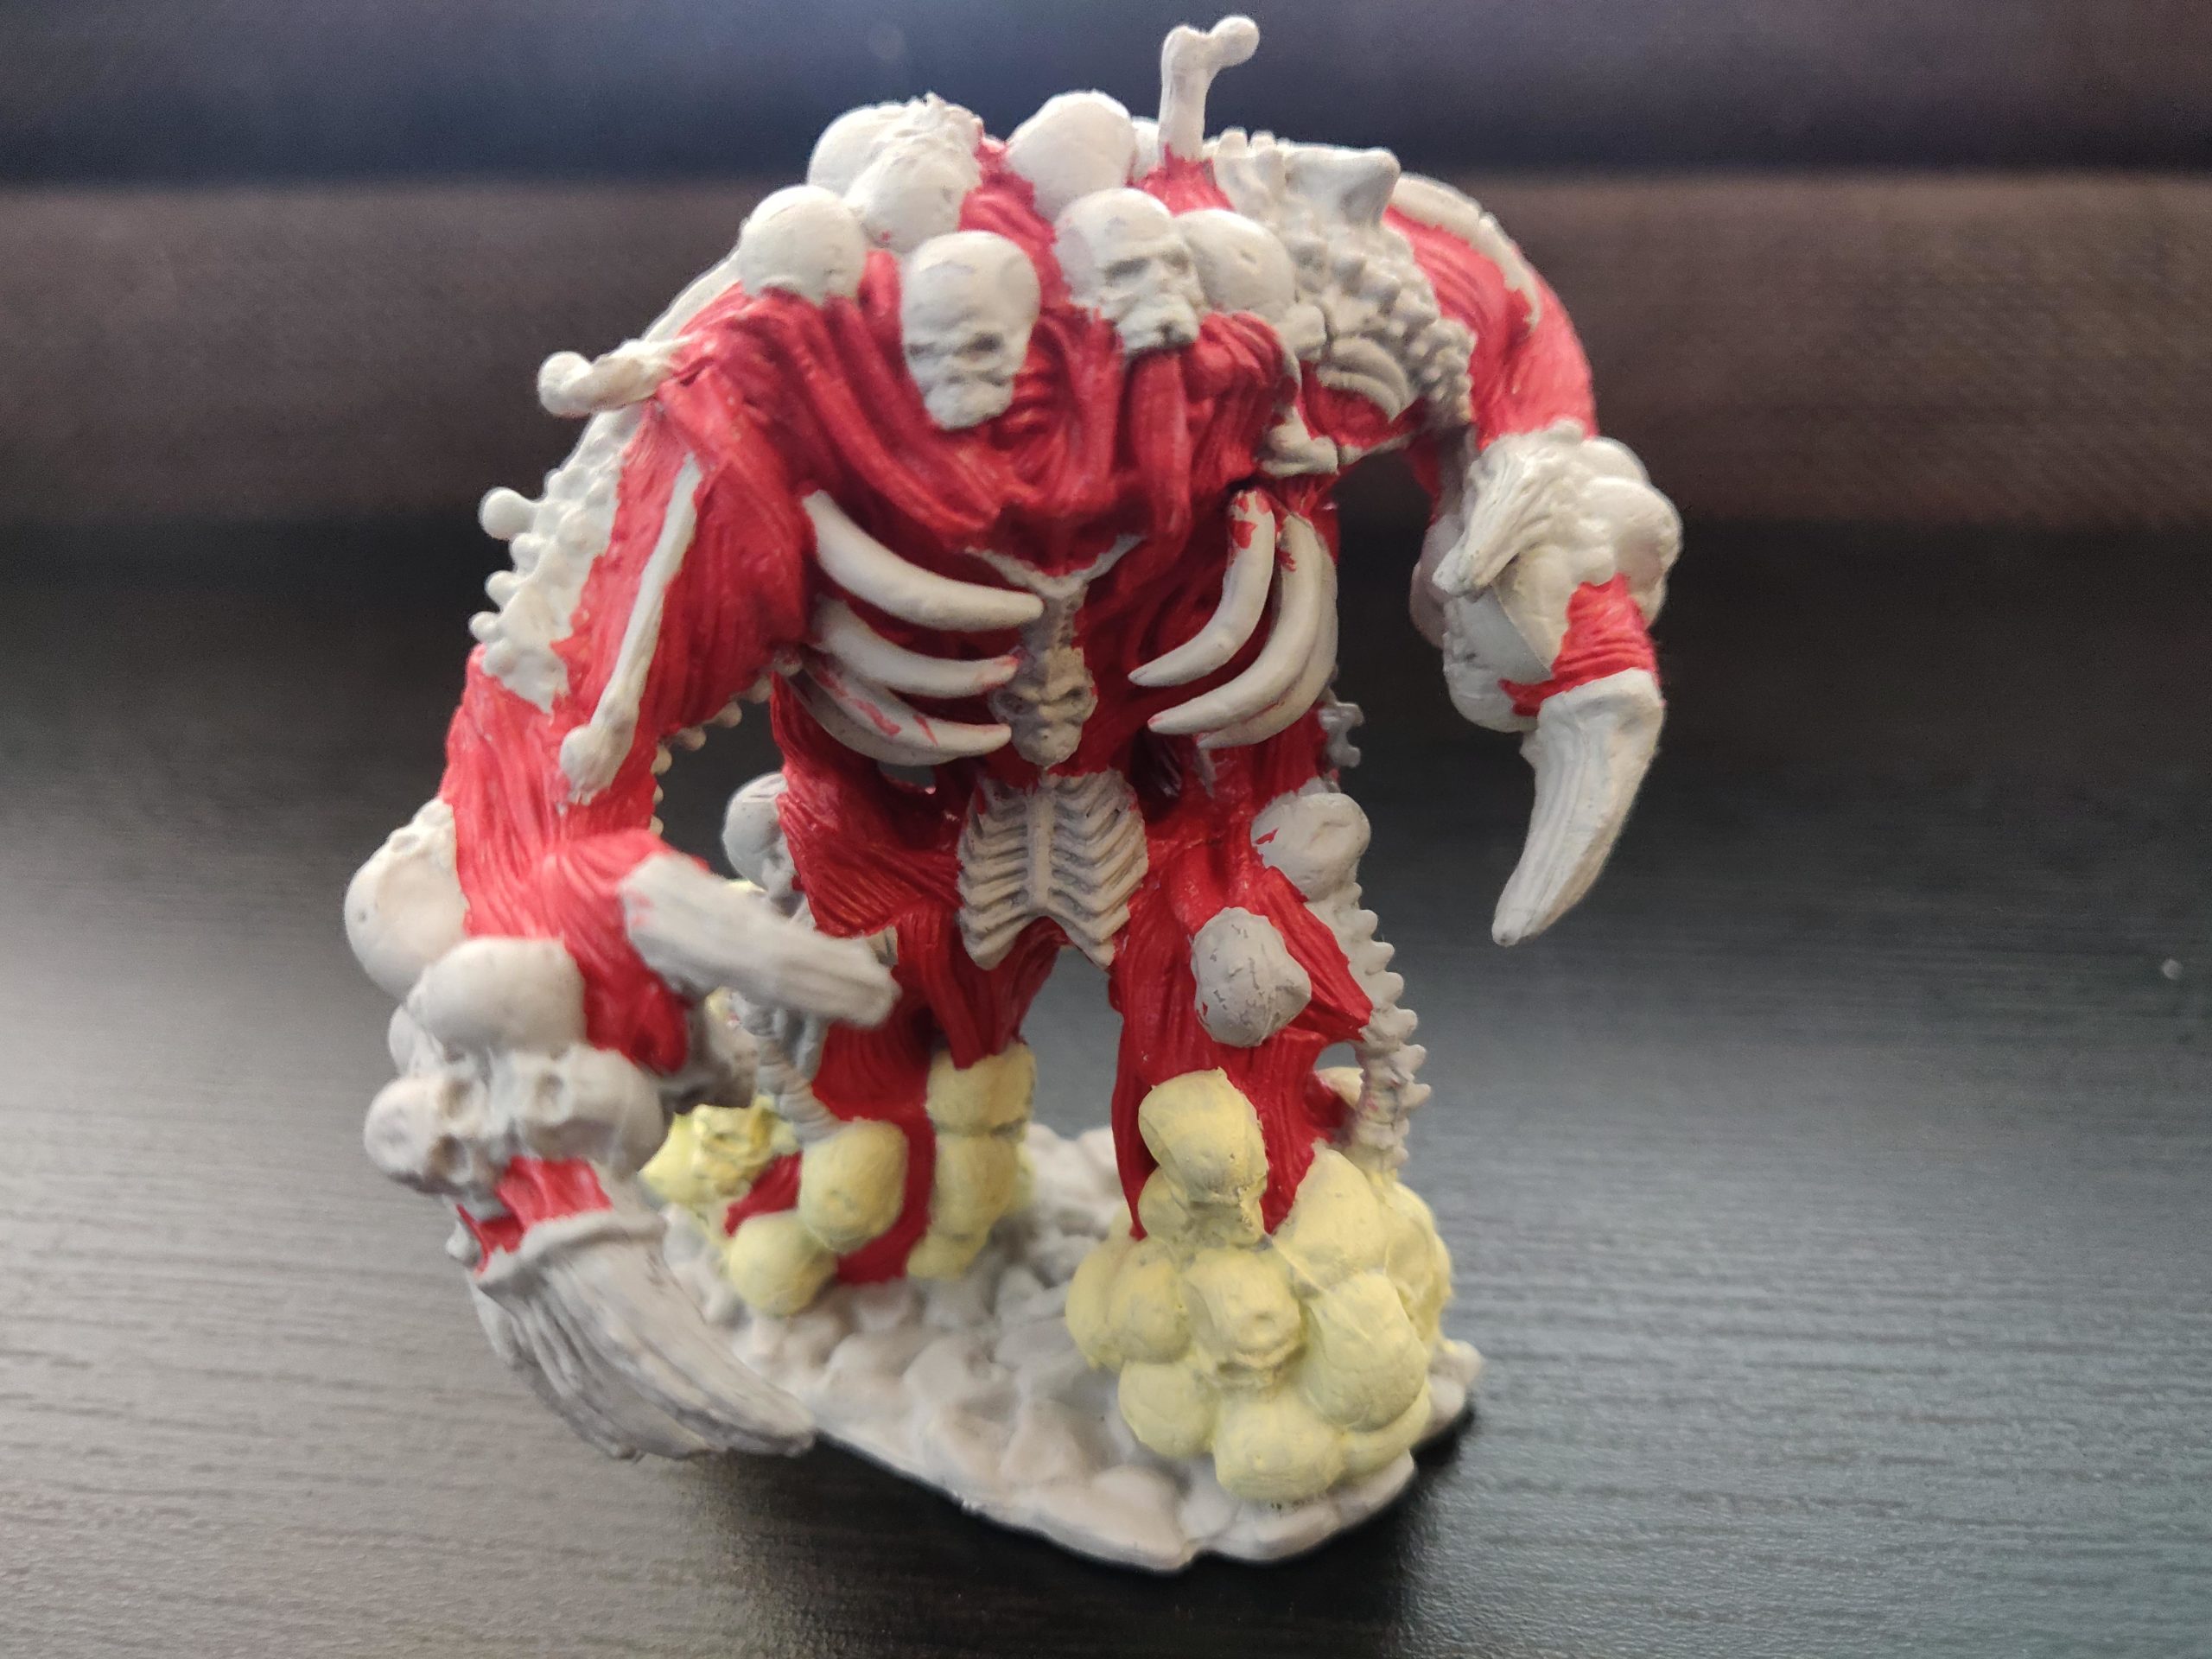
Red basecoat done, bone basecoat begun…

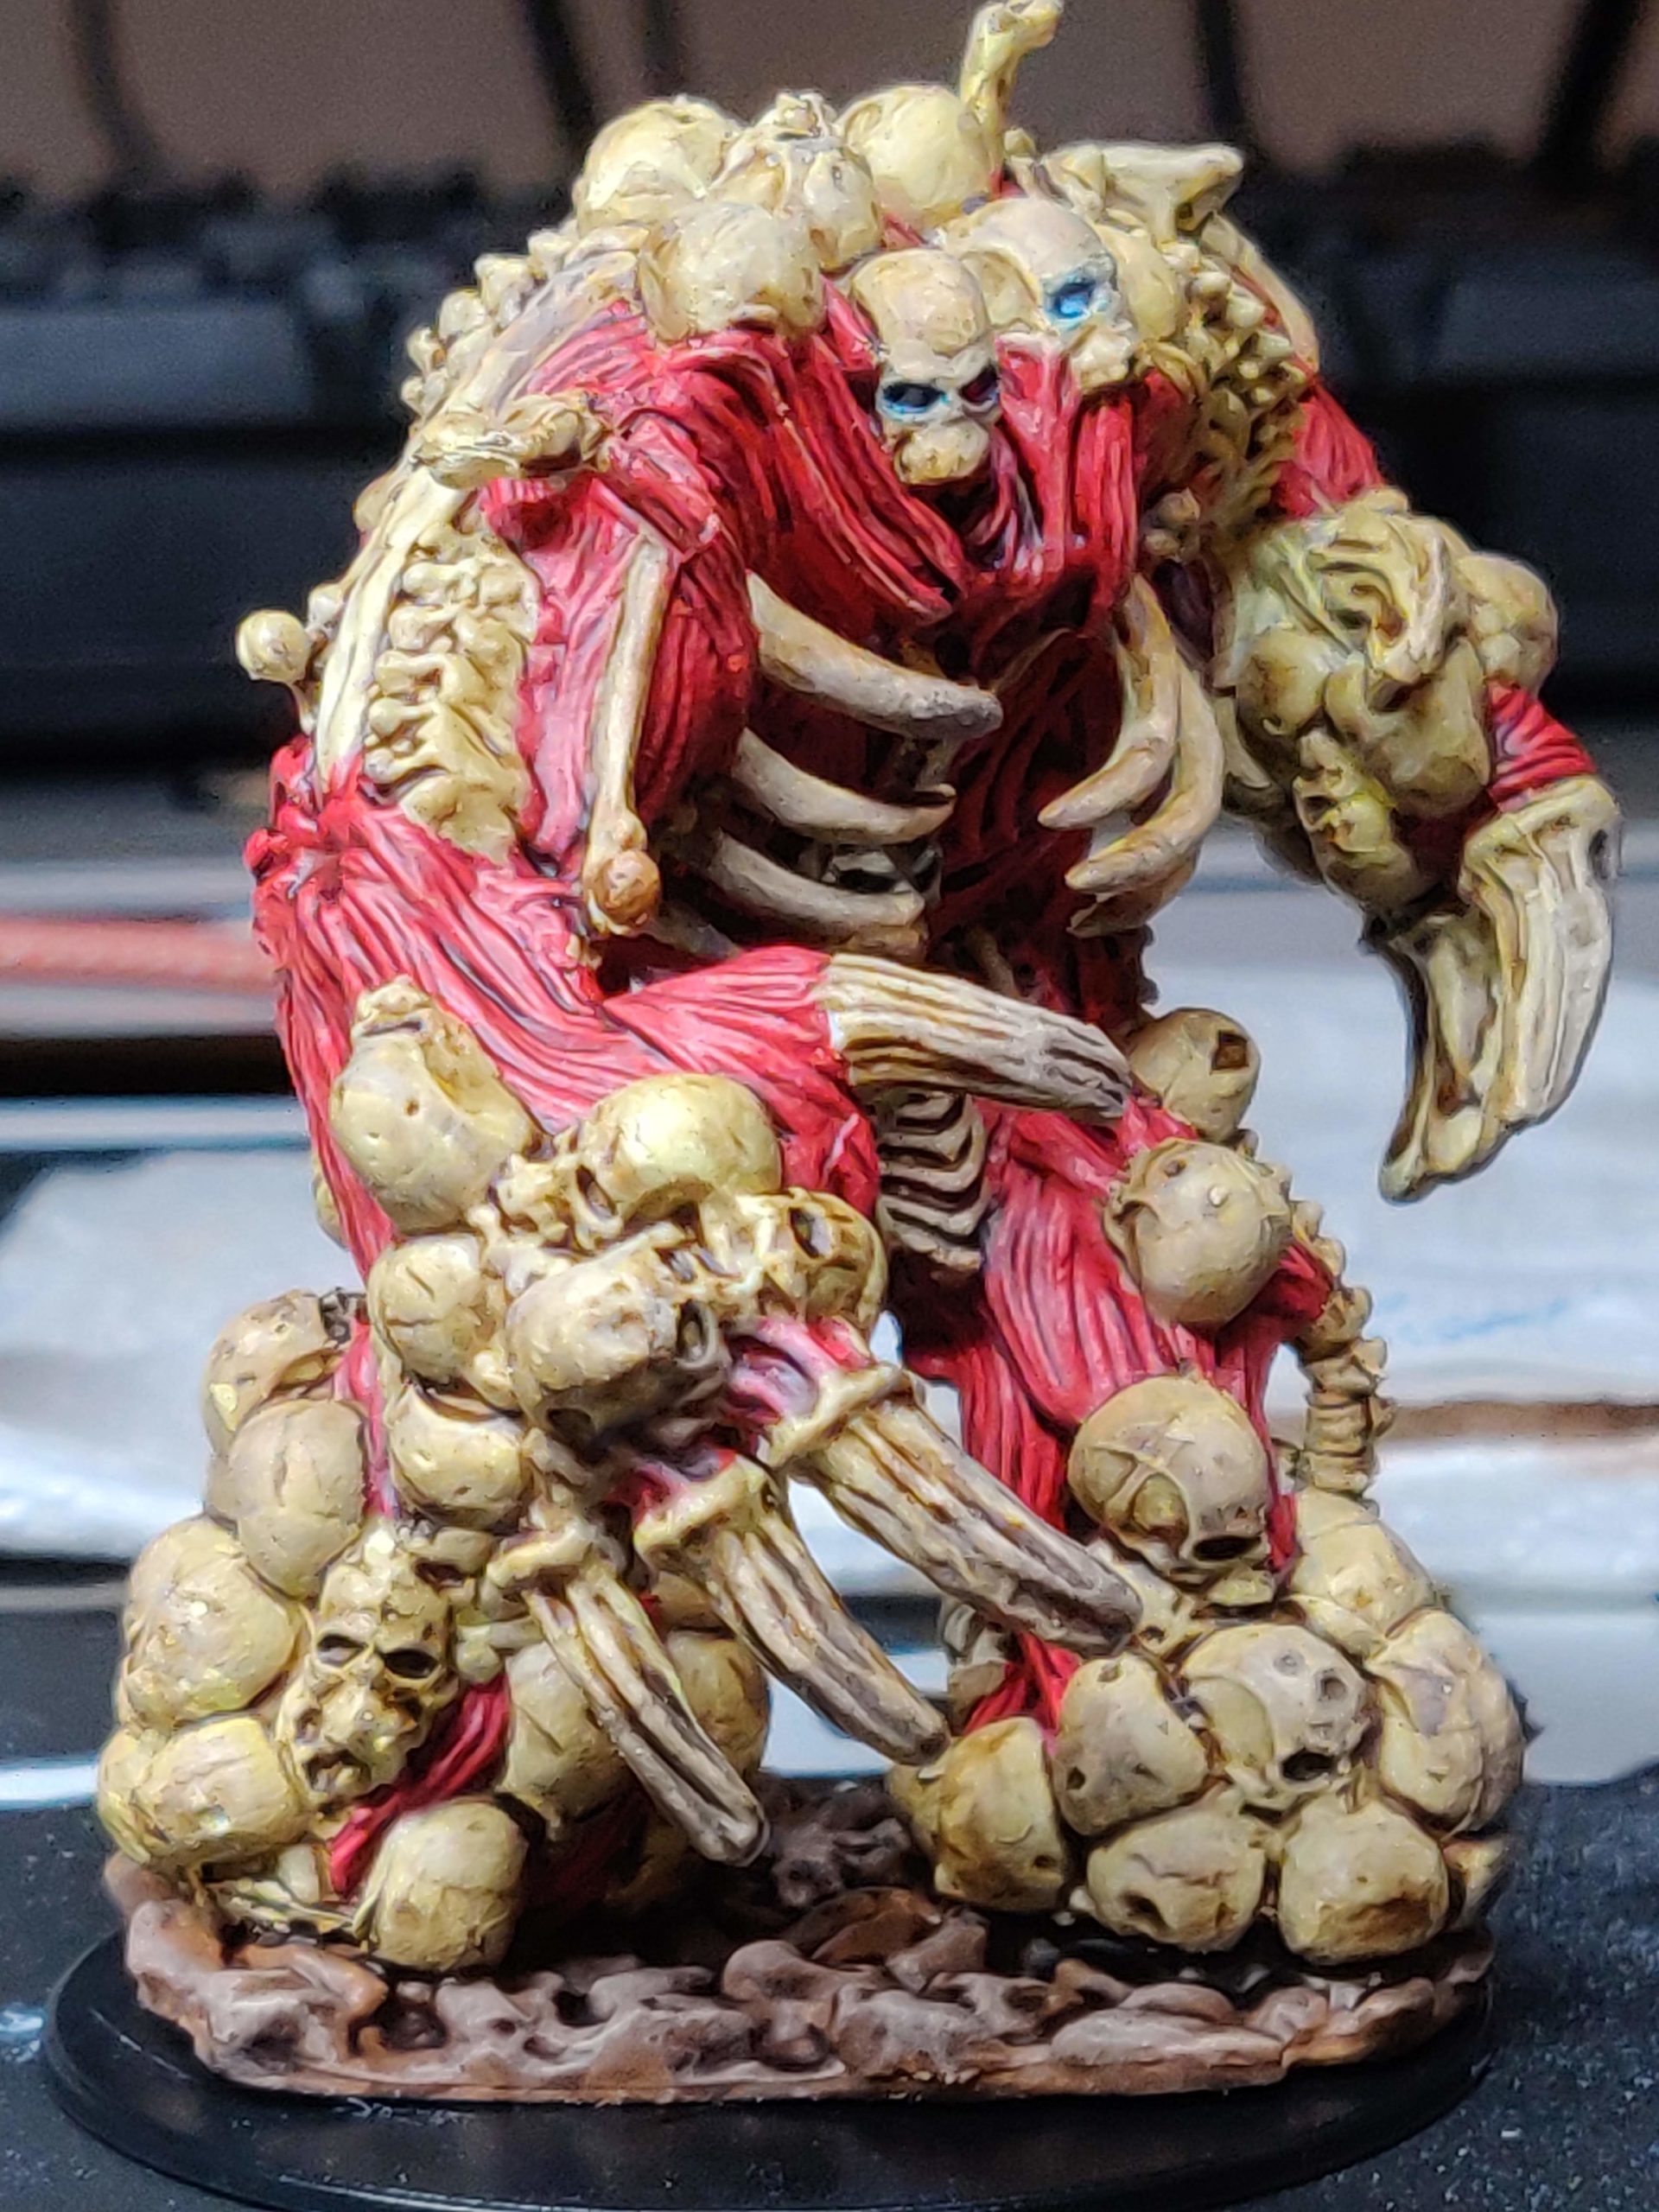
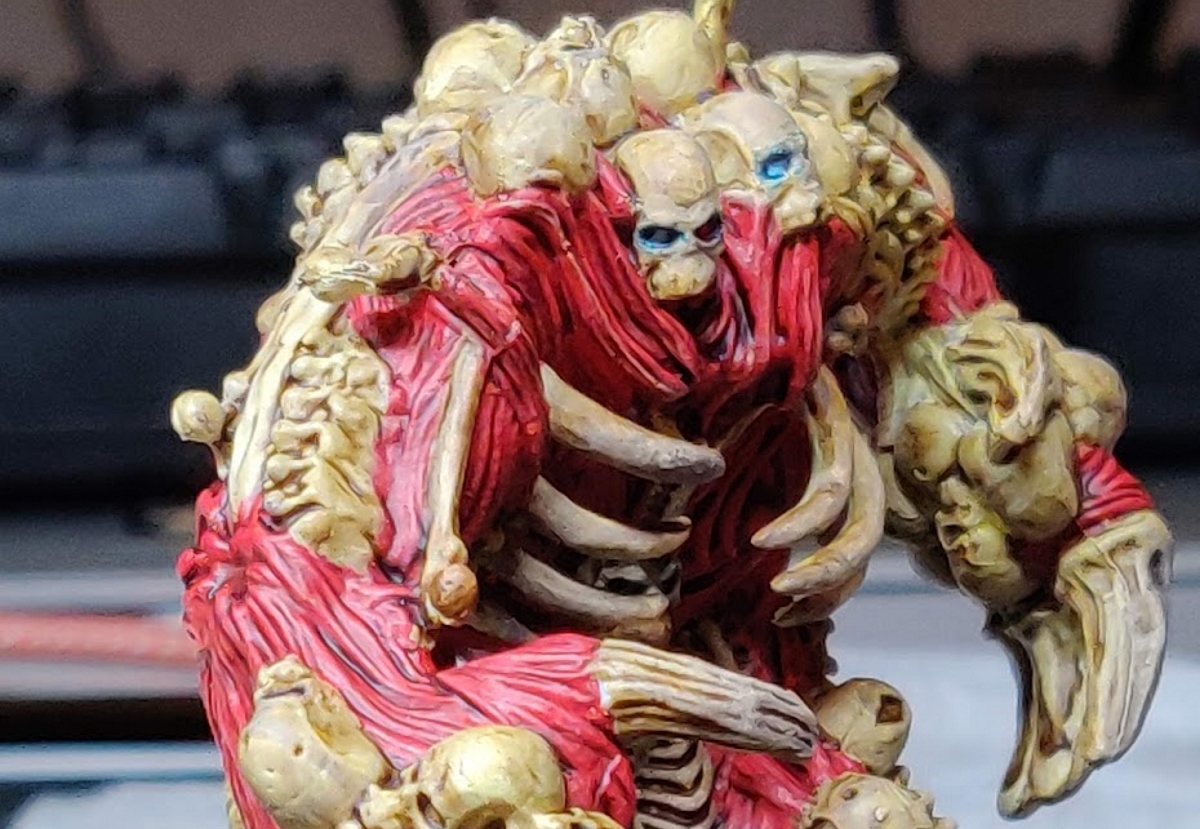
The final miniature with two different kinds of lighting
What am I pleased with?
It was amazing how much this miniature came to life once the red (AP Pure Red) and bone (a mix of AP Daemonic Yellow and Matt White) base coats had a wash of Strong Tone applied over them. Seriously, it was amazing! What had been a rather plain miniature was transformed into this hulking, sinister presence. I had some great compliments about this miniature from friends who don’t paint, and I think it’s because a wash does a lot of heavy lifting on a miniature with so many crevices.
It’s quite subtle but I also like the increase in contrast produced by drybrushing the bone areas. All I did was dust a little white over the upwards-facing areas, particularly the focal points (the skulls around its ‘face’, the giant McRibs, and the skullpile lower legs). I think this contributes to an overall increase in contrast that further plays to the strengths of the simple painting techniques I used.
My efforts at glowing grey-blue eyes were a failure: I don’t know how to achieve a glowing affect and the miniature just has eye sockets with no sculpting in the recesses to easily apply paint to. However, I do like my choice of colour for this effort, and from a very few angles you can kind of see the effect I was hoping to achieve. If you can be happy with a failure, you must have done something close to right. Right?
I’m also rather pleased that this miniature mostly looks good despite using so few paints: red, white, yellow, brown for the base, a wash, and an ancient pot of Citadel Shadow Grey for the eyes.
What have I learned?
Reader, it was not fun to base coat this miniature! It’s huge and full of hard to reach areas that are nonetheless quite visible.
However, that lack of fun was also educational. You see, I started out painting the red areas with the Army Painter starter brush that came with my box of paints. This was a terrible choice considering how much ground I had to cover. It took me hours just to ‘colour in’ those red parts. I almost broke down when I started doing the same on the bone areas and found that my white-yellow paint mix had such poor coverage that I’d need to do two coats.
When I came back to the miniature after a week or so, I switched to using a Citadel base brush with a much wider/fatter body and it was much quicker and smoother to apply the paint. My mind was blown. This was a great lesson in sensible brush choice!
I’ve also learned that the amount of mouldlines and ‘flash’ (basically this is more crap from the plastic casting process) on cheaper miniatures like this is quite substantial. Cleaning this up is also a poor fit with models that are advertised as “pre-primed” and ready to paint, because in attempting to clean them up you also end up unevenly removing whatever primer is applied. Next time, with these cheaper minis, I might just not clean them up… or only clean up larger, smoother surfaces.
What will I try in future?
I had originally planned to drybrush the muscular, fleshy areas with a pink, but decided against it in the end as I thought it would detract from the darker look of those areas. I still don’t know if that was a sensible decision or not, but next time I could at least experiment with some pinks on the outer areas!
The base of this miniature looks shit. I thought a deep brown would complement the other colours nicely, but the end result – with more generous use of strong tone and a drybrush with the same brown mixed with white – doesn’t look good. I’m not sure what I could have done differently but some options I can think of would’ve been going with a range of greys instead of browns, or using a range of whitened browns to get more different shades in there.
Thinking on it more, I don’t even know what that ground under the golem’s feet is supposed to be in my paintjob. It’s not stone, and mud… doesn’t look like that? What is it? At the end of the day when we’re painting miniatures we’re painting something that is situated somewhere, and when I painted that base I didn’t think clearly about where this monster was. Another lesson learned!