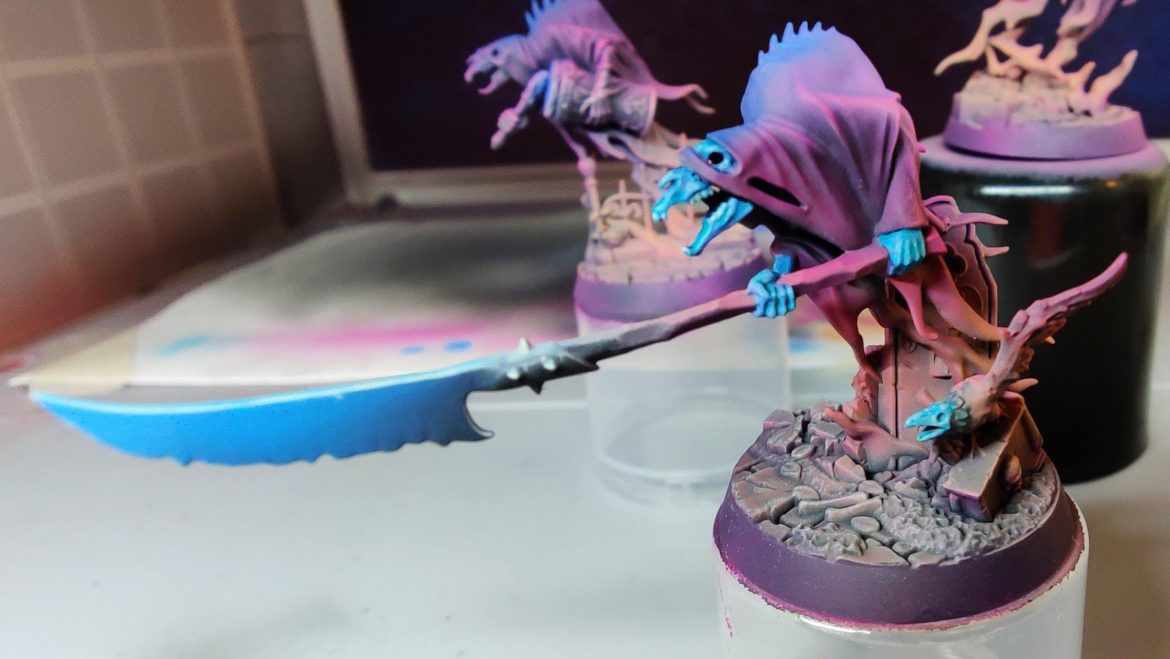
I bought myself a new airbrush compressor a few months ago, and a box of Nighthaunt my girlfriend bought me last year were perfect subjects for moving beyond priming and basecoating with my airbrush.
The compressor isn’t a fancy model. It’s a Fengda. It’s possible your airbrush compressor is a Fengda too. As far as I can tell, outside the big brand names, most compressors on the market are regionally rebranded Fengda compressors. It’s cheaper if you can buy direct from a Fengda distributor, to the point my compressor was less than half the price – including delivery from Germany – compared to buying the same item with a Swedish company’s name stuck on it here in Finland. Go figure. Anyway, mine has a 2 litre tank and a nice holder for two airbrushes, which is perfect as it included a free airbrush. Now I have two airbrushes; I’ve got a 0.3mm needle in one, and a 0.5mm needle in the other.
The main advantage of the new compressor is I can work for longer with a nice, steady airflow. I’m confident it was due to my own lack of technique and experience as much as the bottom-end airbrush and compressor, but I found it hard to get a steady flow of paint with my previous setup, and now that I’ve changed the compressor I find I can work for a little longer without running into problems.
Dana Howl’s a miniature painting YouTuber I’ve been watching for the past year. She combines a dry sense of humour with striking techniques and a distinct style, which she teaches and breaks down in her videos. These synthwave ghosties are a fine example of the kind of things she does; undercoating in black and white before building up colour, in this case smooth transitions between distinct colours. Watch this video if you want to know more.
If you check out my photos you’ll see the gist of the approach. In one photo you can see the miniatures after a simple zenithal prime–spraying white paint from directly above the miniature over a black layer of paint, producing lighter colouration towards the top and upward-facing parts of the model. In another you can see them after some brush work to blackline recesses and punch up the whitest highlights. The difference in contrast is considerable.
In retrospect I could have gone much further with the contrast. In the end, my whites did not go white enough! I believe this is why my overall results lack the vibrancy of those in Howl’s video. I’m okay with this; it’s a learning experience, and I’m still happy with the results. Now they stand as a reminder to myself: do not hold back.
Aside from undercoating, airbrush glazing was the other major part of the process. It was challenging, largely because I’m not yet experienced in pointing the airbrush where I want it. If you’ve never used an airbrush, you may not realise that it’s not a simple matter to hold and point this object at an obtuse angle to your line of sight, doing so at just such a distance with just such an amount of pressure on the trigger for just such an amount of time in order to place paint where you want it. This can only come with time and practice.
Even after making various mistakes the results still look good. If I were to repeat just this part of the paintjob, I would be more mindful of where I was placing which colours on the model overall. The proportional coverage is a little off, with several colours limited to the very top of each model, making certain transitions more cramped than I wanted. Again, it’s a learning experience; how and where you place paint is pretty much the core of this hobby.
After the airbrush steps were completed I tried a few different methods for painting the exposed bone. After a little experimentation I settled on some slightly watered down Aethermatic Blue contrast paint over a pale blue layer (I forget which paints I used for that) with a few paler highlights after the contrast layer. It was my first time using contrast paint, and it won’t be my last, but the medium was thicker than and the paint did not behave quite like I had expected.
I considered taking some extra steps, but ultimately decided I’d achieved what I wanted to – airbrush glazing over undercoated models – and was happy with the results, so why take the risk of making them worse? Besides, I assembled these pushfit models poorly some time ago (now I know to cut the pegs and glue the pieces for a better fit). Some of them have large gaps: more detail work would have only drawn more attention to such imperfections.
I’m pretty happy with these and my non-painter friends and family have been impressed by the photos. Airbrushes are great, albeit a little noisy and awkward to make use of in a one-bedroom apartment. And it’s great to try new things, particularly when they work out okay.


